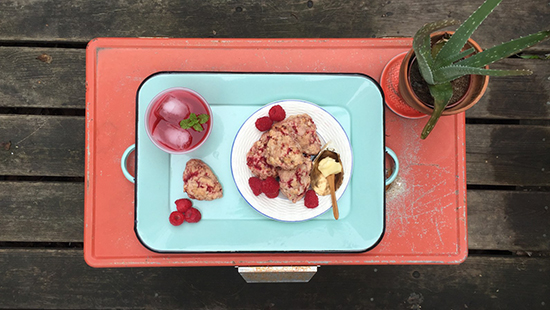
One of my all-time favorite detox recipes is this Nourishing Miso Breakfast Soup. Okay, okay, so it’s not exactly a big batch recipe – though you could totally prep all ingredients except the eggs, broth and miso in advance of your work week – but it is easy like Sunday mornings are supposed to be. In under 30 minutes (20 once you get it down), you’ll have a warm, healthy and savory breakfast that will change the way you thing about this meal. If you simply can’t get behind the soup for breakfast thing, this also makes a super quick and convenient weeknight dinner. Go on, get outside your box and try something a little different!
Maple-Apple Cake Donuts
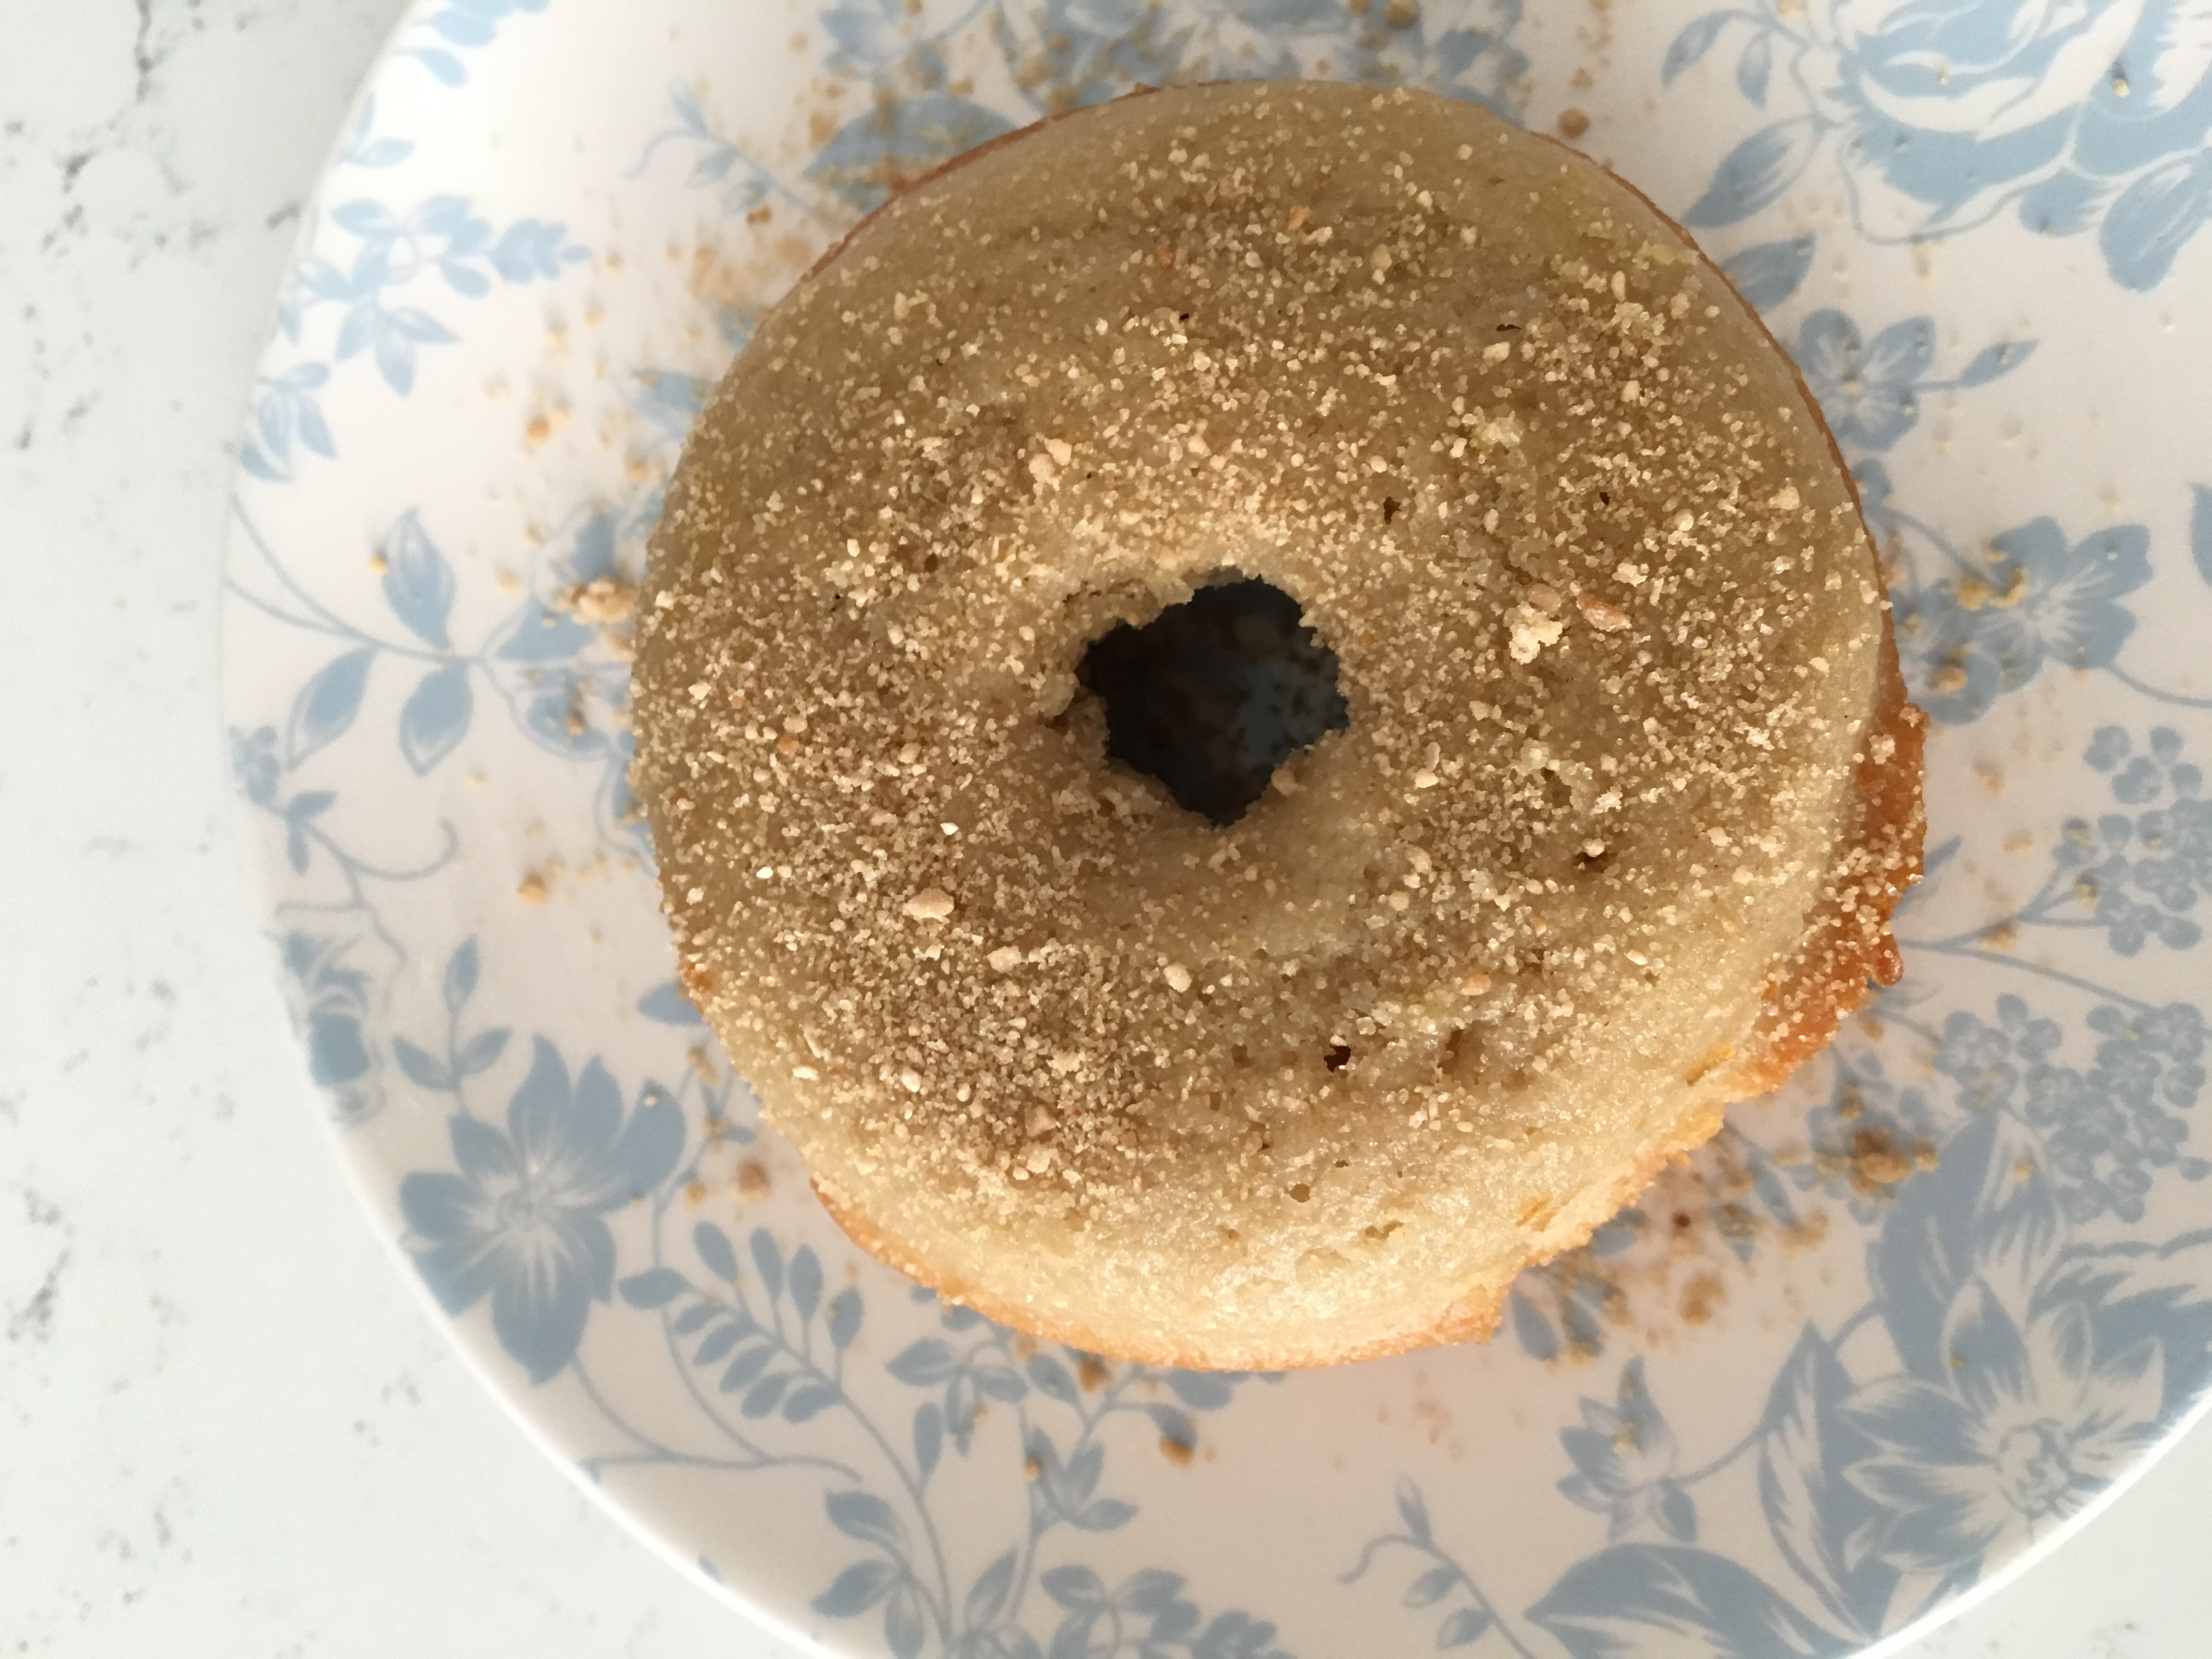
Sure, pumpkin anything is bringing sexy back this fall (and all the falls) but apples have been an autumnal all-star far longer. We could do a comparison table here showcasing everything you can do with apples versus pumpkin and I bet these two tasty ingredients would be neck-and-neck, but that is too much formatting and work for me to handle before my next yoga class (truth be told). So instead, I’m going to tell you about how I turned this delicious Pumpkin Cake Donut recipe from King Arthur Flour into a Maple-Apple Cake Donut using apples I picked from my local Waters Orchard.
Growing up in Massachusetts, my favorite donuts were those powdered cake donuts from Dunkin’ Donuts which inevitably left more sugary dust on your chin and clothes than made it into your mouth. I loved the fluffy texture and sweet remnants you got to lick off your lips after the treat was done. As a nutrition coach, I tend not to eat or recommend too many donuts these days but if you’re going to do it, do it good.
The following Maple-Apple Cake Donut recipe was inspired by sweet apples and a small jar of granulated maple sugar from my parents up in New England. The ingredients did the talking, King Arthur helped me with the baseline, and my creative mind made swaps to cut back on added sugar and fuse these fluffy Os with fall flavor.
MAPLE-APPLE CAKE DONUTS
Makes 12 donuts
Ingredients:
- 1/4 cup coconut oil, melted
- 1/2 stick of butter (or 1/4 cup), melted
- 3 large eggs
- 1/2 cup cane sugar
- 1/4 cup light brown sugar
- 2 Tbs maple syrup
- 1 1/2 cups 15-minutes homemade apple sauce (recipe follows)
- 1 tsp ground cinnamon
- 1/4 ts ground nutmeg
- 1/8 tsp ground cloves
- 1 1/2 tsp fine sea salt
- 1 1/2 tsp baking powder
- 2 cups all-purpose flour, level
- Granulated maple sugar for dusting
Directions:
- Preheat the oven to 350°F. Lightly grease two donut pans.
- In a large mixer, use the flat beater attachment to combine the oil, butter, eggs, sugars, maple syrup, apple sauce, spices, salt, and baking powder until smooth. (You can also do this by hand with a little elbow grease and a whisk).
- Add the flour, stirring just until smooth.
- Fill the wells of the donut pans about to the top but be careful they don’t overflow.
- Bake for ~18 minutes, or until a toothpick inserted into the center of one comes out clean.
- Remove from the oven, let cool a few minutes, loosen the edges (if need be) with a butter knife, and gently flip onto a rack to cool.
- While the doughnuts are still warm generously dust them with granulated maple sugar (or cinnamon sugar).
- Let cool completely and store at room temperature for several days. I like to place them on a plate, stick them with toothpicks, and tent them with plastic wrap so they have room to breath.
HOMEMADE APPLE SAUCE
Ingredients:
- 2 extra large or 3 large apples – peeled, cored and chopped
- 1 tsp brown sugar
- 1/2 tsp ground cinnamon
Directions:
- In a medium microwavable mixing bowl, combine prepped apples with sugar and cinnamon.
- Microwave for 3 minutes, stir, and microwave again another 3-4 minutes until apples are soft (not mushy) when pricked with a fork.
- Transfer to a blender or food processor and blender until mostly smooth (any little chunks will taste delicious when you bite into them).
Big Batch Breakfast (Part Deux): Healthy Veggie & Cheese Egg Muffins
Breakfast just got a whole lot easier. If you’re on the go as much as I am, it always pays off to spend a little extra time over the weekend to prepare some grab-and-go meals that will keep your full and focused throughout the week no matter what calendar cluster-Fs may arise.
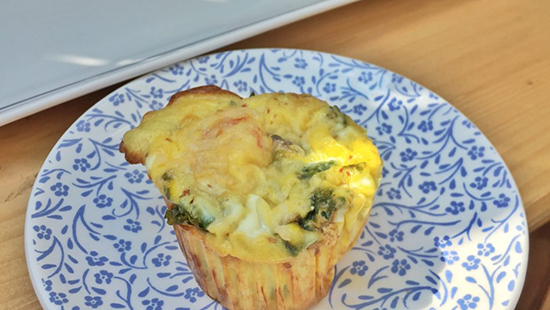
For the past two weeks I’ve been making a big batch of healthy egg muffins on Sunday afternoosn, switching up the vegetables and accoutrements to keep things interesting. Below you’ll find my current favorite, but you can check my Instagram account for a recipe with asparagus, summer corn, and grape tomatoes. You can’t go wrong with either!
Big Batch Breakfast (Part Deux): Healthy Veggie & Cheese Egg Muffins
Makes 12 egg muffins, or 6 servings.
Ingredients:
- Butter, coconut oil or nonstick cooking spray, to coat pans – or, use silicone baking cups
- 8 large eggs
- Splash of milk (can use nut milk if preferred)
- Generous pinch of sea salt and ground pepper
- 2 sprigs of fresh thyme, de-stemmed and minced
- 2 tsp olive oil
- 2 cups kale, cut into thin ribbons
- 1/2 cup sweet & spicy cherry peppers
- 1/2 large red onion, finely chopped
- 1 clove of garlic, minced
- 3/4 – 1 cup shredded parmesan
Directions:
- Preheat the oven to 350°F.
- Crack eggs into a large bowl and whisk with the milk, thyme, salt and pepper.
- Grease a 12-cup muffin pan as desired.
- Sauté red onion in olive oil for 5 minutes over medium-high heat with a pinch of salt. Add kale, sweet and spicy pepper, and garlic and sauté another 5-7 minutes.
- Divide veggie mixture and cheese between each muffin cup, then carefully pour eggs in until muffin tins are almost full – leaving about a 1/4-inch space.
- Bake for 20-25 minutes or until a wooden pick inserted in the center of a muffin comes out clean. The egg muffins will look like soufflé when they come out of the oven, but they will sink after a few minutes. Let them cool for a few minutes before using a rubber spatula to carefully remove each muffin.
Notes:
- Adapted from Popsugar.
- You can consume these immediately or let them cool, then transfer to a resealable plastic bag. They’ll refrigerate well for up to a week or freeze for up to three months.
Big Batch Breakfast: Blueberry Coconut Baked Oatmeal
Let’s face it, oatmeal can get pretty boring, but oats are so good for you – loaded with heart-healthy fiber and minerals. What to do?! Get baked. Err, get baking!
My baked oatmeal is super easy, cost-effective, and since it’s a big batch recipe you’ll be set for breakfast all week. Convenience – check! Taste – check! Healthy – check!
Even if you don’t typically dig oatmeal, give this method a try. It changes the texture and fuses the flavors so you might just feel like you’re eating dessert, all the while you’re fueling yourself with clean energy for an active day. And best of all, there’s no added sugar so there’s no guilt with this breakfast decadence.
Go on, shake up your morning meal. It’s good to the last bite!
Blueberry Coconut Baked Oatmeal
Prep time: 10 mins Cook time: 40 mins Total time: 50 mins
Serves: 8 servings
Ingredients:
- 1/2 cup roasted, unsalted pecan pieces
- 1/2 cup toasted, unweetened coconut flakes
- 1/2 cup hulled hemp seeds
- 1/4 cup chia seeds
- 2 1/2 cups old-fashioned oats
- 1 Tbs ground cinnamon
- A pinch of fine-grain sea salt
- 2 cups fresh blueberries (frozen will work too – just defrost and discard any liquid)
- 2 1/2 cups unsweetened almond milk
- 2 large eggs
- 2 Tbs melted coconut oil
- 1 tsp vanilla extract
- Optional toppings for serving: plain yogurt, maple syrup or honey for drizzling, and/or more fresh fruit
Directions:
- Preheat the oven to 375 degrees. Grease a 9×13-inch rectangular baking dish with butter or coconut oil.
- In a medium mixing bowl, combine the oats, nuts, coconut flakes, hemp seeds, chia seeds, cinnamon and salt. Whisk to combine.
- In a smaller mixing bowl, combine the almond milk, eggs, coconut oil and vanilla. Whisk until blended.
- Spread the berries evenly over the bottom of the baking dish then cover the fruit with the dry oat mixture. Drizzle the wet ingredients over the oats. Use a spatula in zig-zagging strokes across the surface of the wetted oats to smooth out the top and push any dry oats down.
- Bake for approximately 45 minutes, or until the top is golden (not burnt!). Remove your baked oatmeal from the oven and let it cool for a few minutes before cutting and serving.
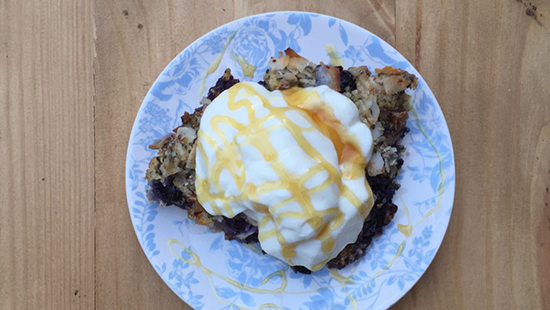
- Serve with yogurt and a drizzle of honey for a more decadent and delicious breakfast experience!
Notes:
- This recipe will keep well in the refrigerator for up to 7 days.
- Recipe adapted from Cookie & Kate.
Rosewater Raspberry Gluten-Free Scones
I highly recommend taking a long weekend with friends, yummy food, and outdoor walks in the sunshine; and without a computer or to do list. Like highly recommend it. I recently did just this up in NYC with some of my dearest girl friends with whom (is that proper grammar??) I studied abroad nearly 10 years ago. Damn, the years are flying by! Anyways…
We had a ball! Despite bopping around a bunch like an itinerant little gypsy, the weekend wasn’t stressful at all. Leaving my computer at home certainly helped, but mostly it was my lack of an agenda – something I struggle to let go of in my daily DC grind – that created space and time to do everything I needed and wanted with flexibility and a sense of ease.
Here are some highlights…
On Saturday, I went to the Union Square Famers Market (amazing) and gawked at peonies the size of my face and farm-fresh eggs that looked like the most beautiful golden nuggets I’ve ever seen. I would have stayed there the whole day if it weren’t for the sweltering heat and sweaty mess I had quickly become.
Sunday, was a day filled with jamm, which means “peace” in Wolof, Senegal’s native tongue. The girls and I throw that word around a lot when we’re together since Dakar was our study abroad destination and jamm was our main objective while there.
All day I was surrounded by these four mighty and magnificent women who inspire, nurture and love me to no end. How lucky am I? Together, we made a version of the gluten-free scones you’ll see below as well as some delicious frittatas.
Food is always best when made with love and enjoyed in good company. All of that was abundant and then some. We gabbed for hours while dining al fresco on a Brooklyn co-op rooftop. Heaven on earth.
I rounded out the weekend spending time with one of my other very best friends from childhood, Court. Actually, let’s call her my sister. Much more appropriate for our bond. We’ve known each other since age four and no matter how long we go in between visits, it feels like we’ve never skipped a beat.
While waiting for her arrival at an amazing Jewish Deli somewhere in lower Manhattan, I decided to express my joy for a weekend well spent with a little urban hand-standing. What else is a yogi to do?
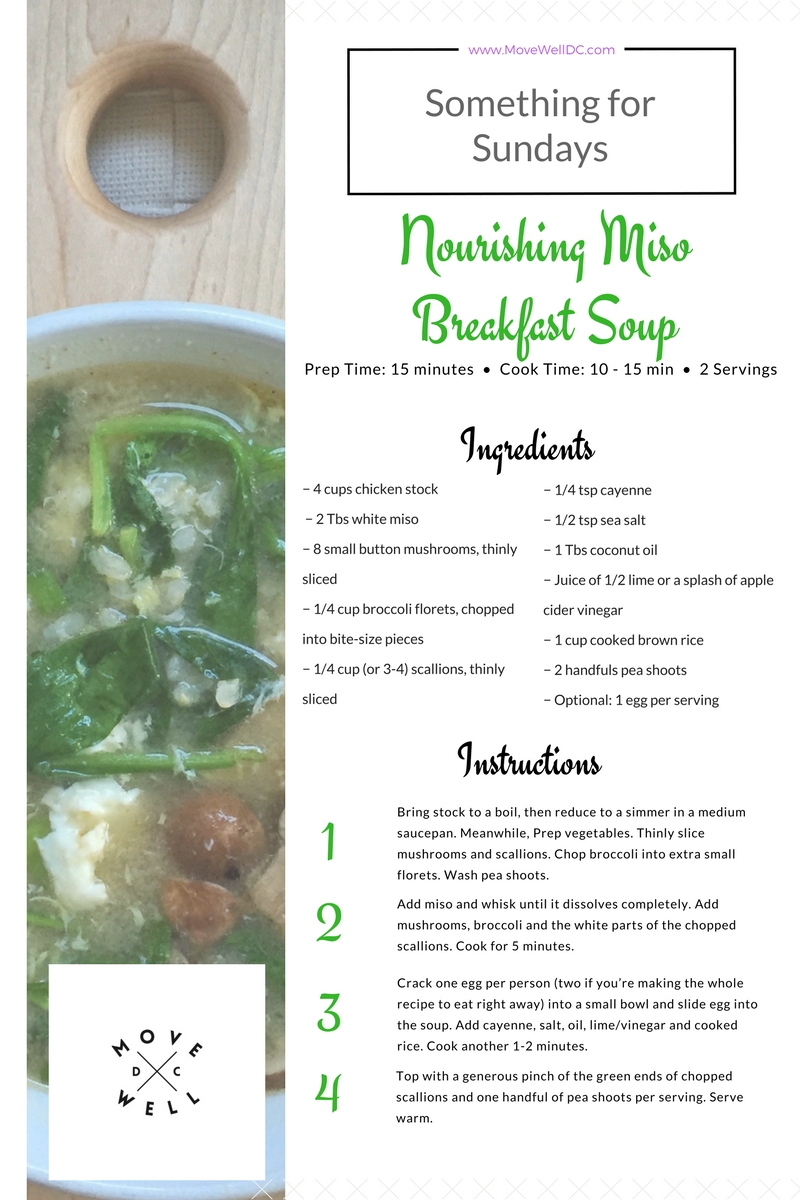
I could regal you with all the mundane details of what made that weekend so magical in my mind, but instead I’ll simply suggest you try out these Rosewater Raspberry Scones and taste for yourself some of the love and jamm I brought back with me from NYC.
Rosewater Raspberry Gluten-Free Scones
- 2 1/2 cups Bob’s Red Mill Gluten-Free Biscuit Mix
- 1/2 cup Gluten-Free Rolled Oats
3/4 cup 2% or Whole Milk (note: you can substitute 1/2 cup unsweetened almond milk + 1/4 cup plain coconut milk yogurt to make this vegan) - 10 Tbs butter, cold and cubed
- 1/4 cup Rosewater
- 1 large egg
- 1/3 cup cane sugar
- Zest of one lemon
- 1 1/2 cups fresh raspberries
- Optional: 2-3 Tbs Milk for basting
- Optional: sprinkle of corse sea salt
Directions:
- Preheat oven to 350 degrees Fahrenheit.
- Combine dry ingredients in a large bowl. Blend with butter cubes using a pastry cutter. You can also use your finger to pinch the butter into the flour mixture if you don’t have one.
- In a separate smaller bowl, whisk together milk, egg, rosewater, zest and sugar.
- Combine the wet and dry ingredients in the larger of the two bowls. Knead with your hands until dough is combined. It may be a bit chunky/flaky, but that’s good for scones.
- Fold in raspberries until evenly distributed.
- Shape into small round disks, approximate 2 – 2 1/2″ in diameter. Place on a lined baking sheet 1″ apart.
- Baste raw biscuits with a smear of milk, then sprinkle lightly with corse sea salt.
- Bake at 350 degrees for 22-26 min, or until the tops turn golden and a toothpick comes out clean.
Chocolate Zucchini Bread (gluten-free)
A little bit of chocolate goes a long way. Am I right birthday girl (shout out to my sweet mama on her birthday!!)?
A lotta bit of zucchini plus a little bit of chocolate makes for one heck of a tasty/healthy gluten-free bread intended for breakfast but worthy of dessert status.
The nutrient-dense additions and ingredient swaps I’ve made to this Chocolate Zucchini Bread means you’re in charge of when you want to eat it–morning, noon or night–sans guilt!
Zucchini is a great seasonal food this time of year and it’s mild sweetness and high water content ensure this bread will melt in your mouth.
Though I’m a huge flavor skeptic when it comes to gluten-free desserts, this healthy treat delivers with a big chocolate nose and no beany or chalky finish (yes, I used wine terminology right there).
Tip: I like to double up on the recipe and freeze one loaf. It’s a great thing to have on hand when friends and family come to town!
Chocolate Zucchini Bread
{makes one loaf, 12 servings}
Adapted from The Joy of Baking.
What You’ll Need:
- 1 cup gluten-free flour (I used Bob’s Red Mill mix)
- 1/2 cup unsweetened cocoa powder
- 1/2 tsp salt
- 1 tsp baking soda
- 1/2 tsp baking powder
- 1 tsp cinnamon
- 1/2 tsp ground ginger
- 1/4 tsp nutmeg
- 1/4 tsp ground cloves
- 1 banana
- 1/2 cup canola oil
- 2 eggs
- 1/2 cup coconut palm sugar
- 1 tsp vanilla extract
- 1 medium zucchini shredded
- 1/4 cup dark chocolate or carob chips (optional)
- 1/4 cup dried, tart cherries, chopped (optional)
- 1/4 cup slivered almonds (optional)
How to Make It:
- Preheat oven to 350 F placing a rack in the center. Grease or spray a 9″ long loaf pan and set aside.
- Grate the zucchini, using a medium sized grater. Set aside.
- In a large bowl whisk together the gluten-free flour, cocoa powder, baking soda, baking powder, salt, ground cinnamon, nutmeg, ginger and cloves.
- In another large bowl or standing mixer, whisk the eggs, oil, sugar, banana and vanilla extract until well blended.
- Fold in the flour mixture. Then fold in the grated zucchini. Stir in the chocolate chips, cherry pieces and slivered almonds (remember, all are optional!).
- Scrape the batter into the prepared pan and bake until the bread has risen and a toothpick inserted in the center comes out clean (approx. 45 min). Place on a wire rack to cool for about 10 minutes, then remove the bread from the pan and cool completely.
This bread can be stored at room temperature for several days, in the fridge for up to 10, or it can be frozen.
Pumpkin Spice Granola
I really thought my pumpkin obsession had subsided after eating one too many pumpkin-shaped Reese’s peanut butter cups on Halloween. I was truly convinced I’d moved on following my back-to-back pumpkin soup, pumpkin bread, and pumpkin smoothie recipes. I was cured of my fixation–was until I caved and had an almond milk PSL (that’s a pumpkin spice latte for those of you haven’t been to a coffee shop in the last 6 weeks) this weekend. The flame was reignited and the inspiration instantly came to me–I would create my very own PSG (that’s Pumpkin Spice Granola), which it turns out was even better than that PSL.
You’ve heard me rave about the nutritional powerhouse that is pumpkin, so I won’t inundate you with all those fun facts again. Okay well maybe just one sentence to reenforce this gorgeous gourd’s health profile. Pumpkin is packed with fiber, Vitamin A, Vitamin C and a few grams of plant protein, and at only 50 calories per serving is a perfect balance to all that Halloween candy you’ve been eating (guilty as charged).
Without further ado, it’s PSG time!
Pumpkin Spice Granola
What You’ll Need:
- 5 cups gluten-free rolled oats
- 1 cup raw pumpkin seeds (pepitas)
- 1/2 cup coconut oil (liquid or melted)
- 3/4 cup (or half a 15 ounce can) pumpkin puree
- 3/4 cup maple syrup or honey
- 1 Tbs vanilla extract or 1 vanilla bean scraped
- 1 Tbs ground cinnamon
- 1 tsp ground nutmeg
- 3/4 tsp ground cloves
- 1 inch ground fresh ginger
- Optional: 1 cup dried blueberries, chopped dates or tart cherries
How to Make It:
- Preheat the oven to 325°F
- In a large bowl, mix together the oats and raw pumpkin seeds.
- In a blender, blend together the coconut oil, pumpkin puree, maple syrup, vanilla, cinnamon, ginger, nutmeg, and cloves until smooth.
- Pour blender mixture over your dry ingredients and stir until evenly coated
- Spread the mixture on a lipped baking sheet, pressing it down to evenly cover all the way to the edges.
- Bake for 1 hour, gently turning the granola with a spatula every 15 minutes. Flip in sections so that you’re sure to keep some tasty clumps. Also make sure you move some of the granola from the edges to the middle and from the middle to the edges about halfway through cooking so that it cooks evenly.
- After an hour, turn the oven down to 300°F and cook another 15 -25 minutes. You’ll know it is done when it is dry to the touch and piece left to cool on the counter turns crispy. Remove from the oven and let it cool.
- If you’re adding dried blueberries or cherries, stir them in while the mix is still cooling.
- Store in an air-tight container for up to 2 weeks.
Cherry-Goji Overnight Oats
With all the buzz overnight oats have been getting these days, I felt obliged to give them a whirl. I also wanted to use this as an opportunity to test out how my gut would react to a little Greek yogurt. It’s been nearly two years since I’ve had any dairy but the health benefits of Greek yogurt in particular have left me constantly lusting for its low-cal, high-protein, calcium-and-B Vitamins-packed goodness. I’m happy to report that it did not upset my stomach in the least–must be all those gut-friendly probiotics in there, which not only help regulate digestion but also strengthen your immune system.
While Greek yogurt was the most exciting ingredient for me, the real spotlight ought to be shined on the oats. According to the FDA, all that soluble fiber found in oats lowers LDL cholesterol (aka the bad kind). The antioxidants found in the goji berries, dried cherries and oats themselves have anti-inflammatory properties, making them an excellent choice for athletic, active folks like you and me. Muscle soreness, see ya later!
When you add nutritional rockstar chia seeds into the mix you’re getting a higher concentration of omega-3 fatty acids than salmon. Omega-3s have been linked to health benefits related to conditions including cancer, IBS, lupus and rheumatoid arthritis. One tablespoon contains 18% of your RDA for calcium, tons of fiber and potassium and 4 g of protein. What can I say? Good things come in small packages.
Finally, I can’t let you get to the recipe without a quick reminder of how great maca powder is. If you haven’t hopped on the bandwagon yet, it’s time. Maca is rich in B-vitamins and minerals like calcium, zinc and iron, all of which are essential to proper muscle and energy metabolism function. Ladies suffering from PMS or menopause, this should be your go-to for holistic health. And let’s not leave out the men. Maca powder is said to increase testosterone, boosting your libido and endurance…The list of benefits goes on and on. For more ways to incorporate this Peruvian delight, check out my Top Five Greenies post for some go-to smoothies that’ll jumpstart your morning.
Cherry-Goji Overnight Oats
What You’ll Need:
- 1 cup gluten-free rolled oats
- 6 oz nonfat Greek yogurt
- 8 oz unsweetened vanilla hemp milk
- 2 tbs raw honey
- 2 tsp cinnamon
- 3 tsp maca powder
- 3 tbs chia seeds
- 1/4 cup goji berries
- 1/4 cup tart dried cherries (unsulphured)
How to Make Them:
- Mix all ingredients together in an airtight container and refrigerate overnight.
- Enjoy with your tea or coffee the next morning!
Makes 4 servings and will keep in the fridge for up to a week.
Dairy-Free Banana Bread Muffins
If you liked my Banana Bran Muffins and Blueberry Banana Muffins, you’ll definitely dig my healthy Banana Bread Muffins. Like both of those recipes, this one is made dairy-free by using banana, vegan butter, rice milk and apple sauce. They are soft, moist and a much healthier alternative to most bakery muffins which can pack a serious caloric punch at an average of 450 calories a pop. My version come in at under half that number.
Above being waistline-friendly, these muffins feature folate-full garbanzo bean flour, potassium-packed bananas and nature’s own multivitamin, raw honey. Raw honey contains Vitamins B1, B2, B3, B5, B6 and C, as well as minerals like magnesium, potassium, calcium, sodium chlorine, sulphur, and phosphate.
What You’ll Need:
- 1 cup all-purpose flour
- 1 cup whole wheat flour
- 1/4 cup garbanzo bean flour
- 1 tsp baking soda
- 1 tsp baking powder
- 1/2 tsp cinnamon
- 1/4 tsp salt
- 1/4 tsp ground ginger
- 1/4 tsp ground nutmeg
- 1/2 cup raw honey
- 1/4 cup cane sugar
- 1/2 cup coconut oil or Earth Balance “butter”
- 2 large eggs
- 3 very ripe bananas
- 8 oz unsweetened apple sauce
- 1/2 cup rice milk (or almond/coconut)
- 1 tbs vanilla extract
- Optional: 1/2 cup of any of the following–dark chocolate bits, walnuts, dates
How to Make Them:
- Pre-heat oven to 350°F; spray 12-muffin pan with oil or line with fun paper liners
- In a bowl, mix together dry ingredients (flours, baking soda and powder, spices and salt)
- In a separate, large bowl (or KitchenAid mixer if you have one), vigorously whisk together sugar, honey and vegan butter until smooth. Add eggs and whisk again on high until mixture stiffens. Add in your mashed banana, apple sauce, rice milk, and vanilla extract.
- Slowly fold dry ingredients into wet ingredients.
- Once combined, gently mix in optional treats (dark chocolate bits, walnuts, dates)
- Evenly distribute batter across muffin pan; bake for 45 min (or until a toothpick comes out clean)
A Very Veggie-ful Frittata
I don’t know about you, but after what feels like 3 weeks of gluttony and (wonderful) indulgence, my body is beginning to rebel. Feed me veggies! It says with a pleading pout. Alas, another healthy recipe here to the rescue! Inspired by Martha Rose Shuman’s New York Times frittata recipe, I decided this was the perfect way to ease back into healthy eating. This is definitely guilt-free comfort food and a great way to get back on track without having to sacrifice on flavor and satisfaction. It makes for an easy supper or delicious brunch. Best of all, it’s packed with protein, nutrient-rich veggies, and fresh antioxidant-rich herbs–basil and parsley.
What You’ll Need:
- 2 tbs olive oil
- 2 shallots, minced
- 1/2 yellow onion, diced
- 2 large cloves garlic, minced
- 1 cup of mushrooms, sliced (any variety you like)
- 1 cup of zucchini, diced
- 20 grape tomatoes, halved and seeded
- 10 eggs
- 1/4 cup fresh basil, shredded
- 1/4 cup flat-leaf parsley, minced
- Salt & pepper to taste
- 6 slices prosciutto (look for a low-sodium variety)
How to Make It:
- Heat 1 tbs olive oil in a large nonstick and oven-safe frying pan over medium heat. Add shallots and onions, cooking 5-7 minutes or until tender. Add a small pinch of salt and your minced garlic. Stir another minute or so.
- Add zucchini, mushrooms and tomatoes (with another small pinch of salt). Sauté another 5-7 min, or until zucchini and mushrooms are tender and tomatoes are soft. Remove from heat and set veggies aside in a bowl. Rinse and dry pan.
- Whisk your eggs with a couple tbs of water in a bowl. Add salt and pepper to taste, 1/2 the parsley and basil, and veggie mix.
- Heat 1 tbs olive oil in the same pan used before. Test to see if it’s ready by dropping a touch of egg in the pan–if it sizzles and cooks on the spot, you’re good to go. Add your egg mixture and give the pan a few swirls to distribute the veggies evenly. For the first 3-4 min, tilt the pan slightly while lifting the edges of the frittata with a spatula in your other hand a few times. This lets the egg run underneath and form a good firm base.
- Reduce heat to low and cover. Let cook for 10 min like this. Periodically, remove the cover to loosen the frittata with a spatula, preventing the bottom from burning.
- Remove the cover and fan 6 slices of prosciutto around the top of your frittata. Finish it under the broiler for 3 min, keeping an eye on it so it doesn’t burn.
- Remove from oven and let sit for 5-10 min. Garnish with the remaining basil and parsley. And if you aren’t lactose-intolerant (like me) this would be amazing with your favorite shredded cheese on top.
Serve right out of the pan, rustic style, and enjoy!