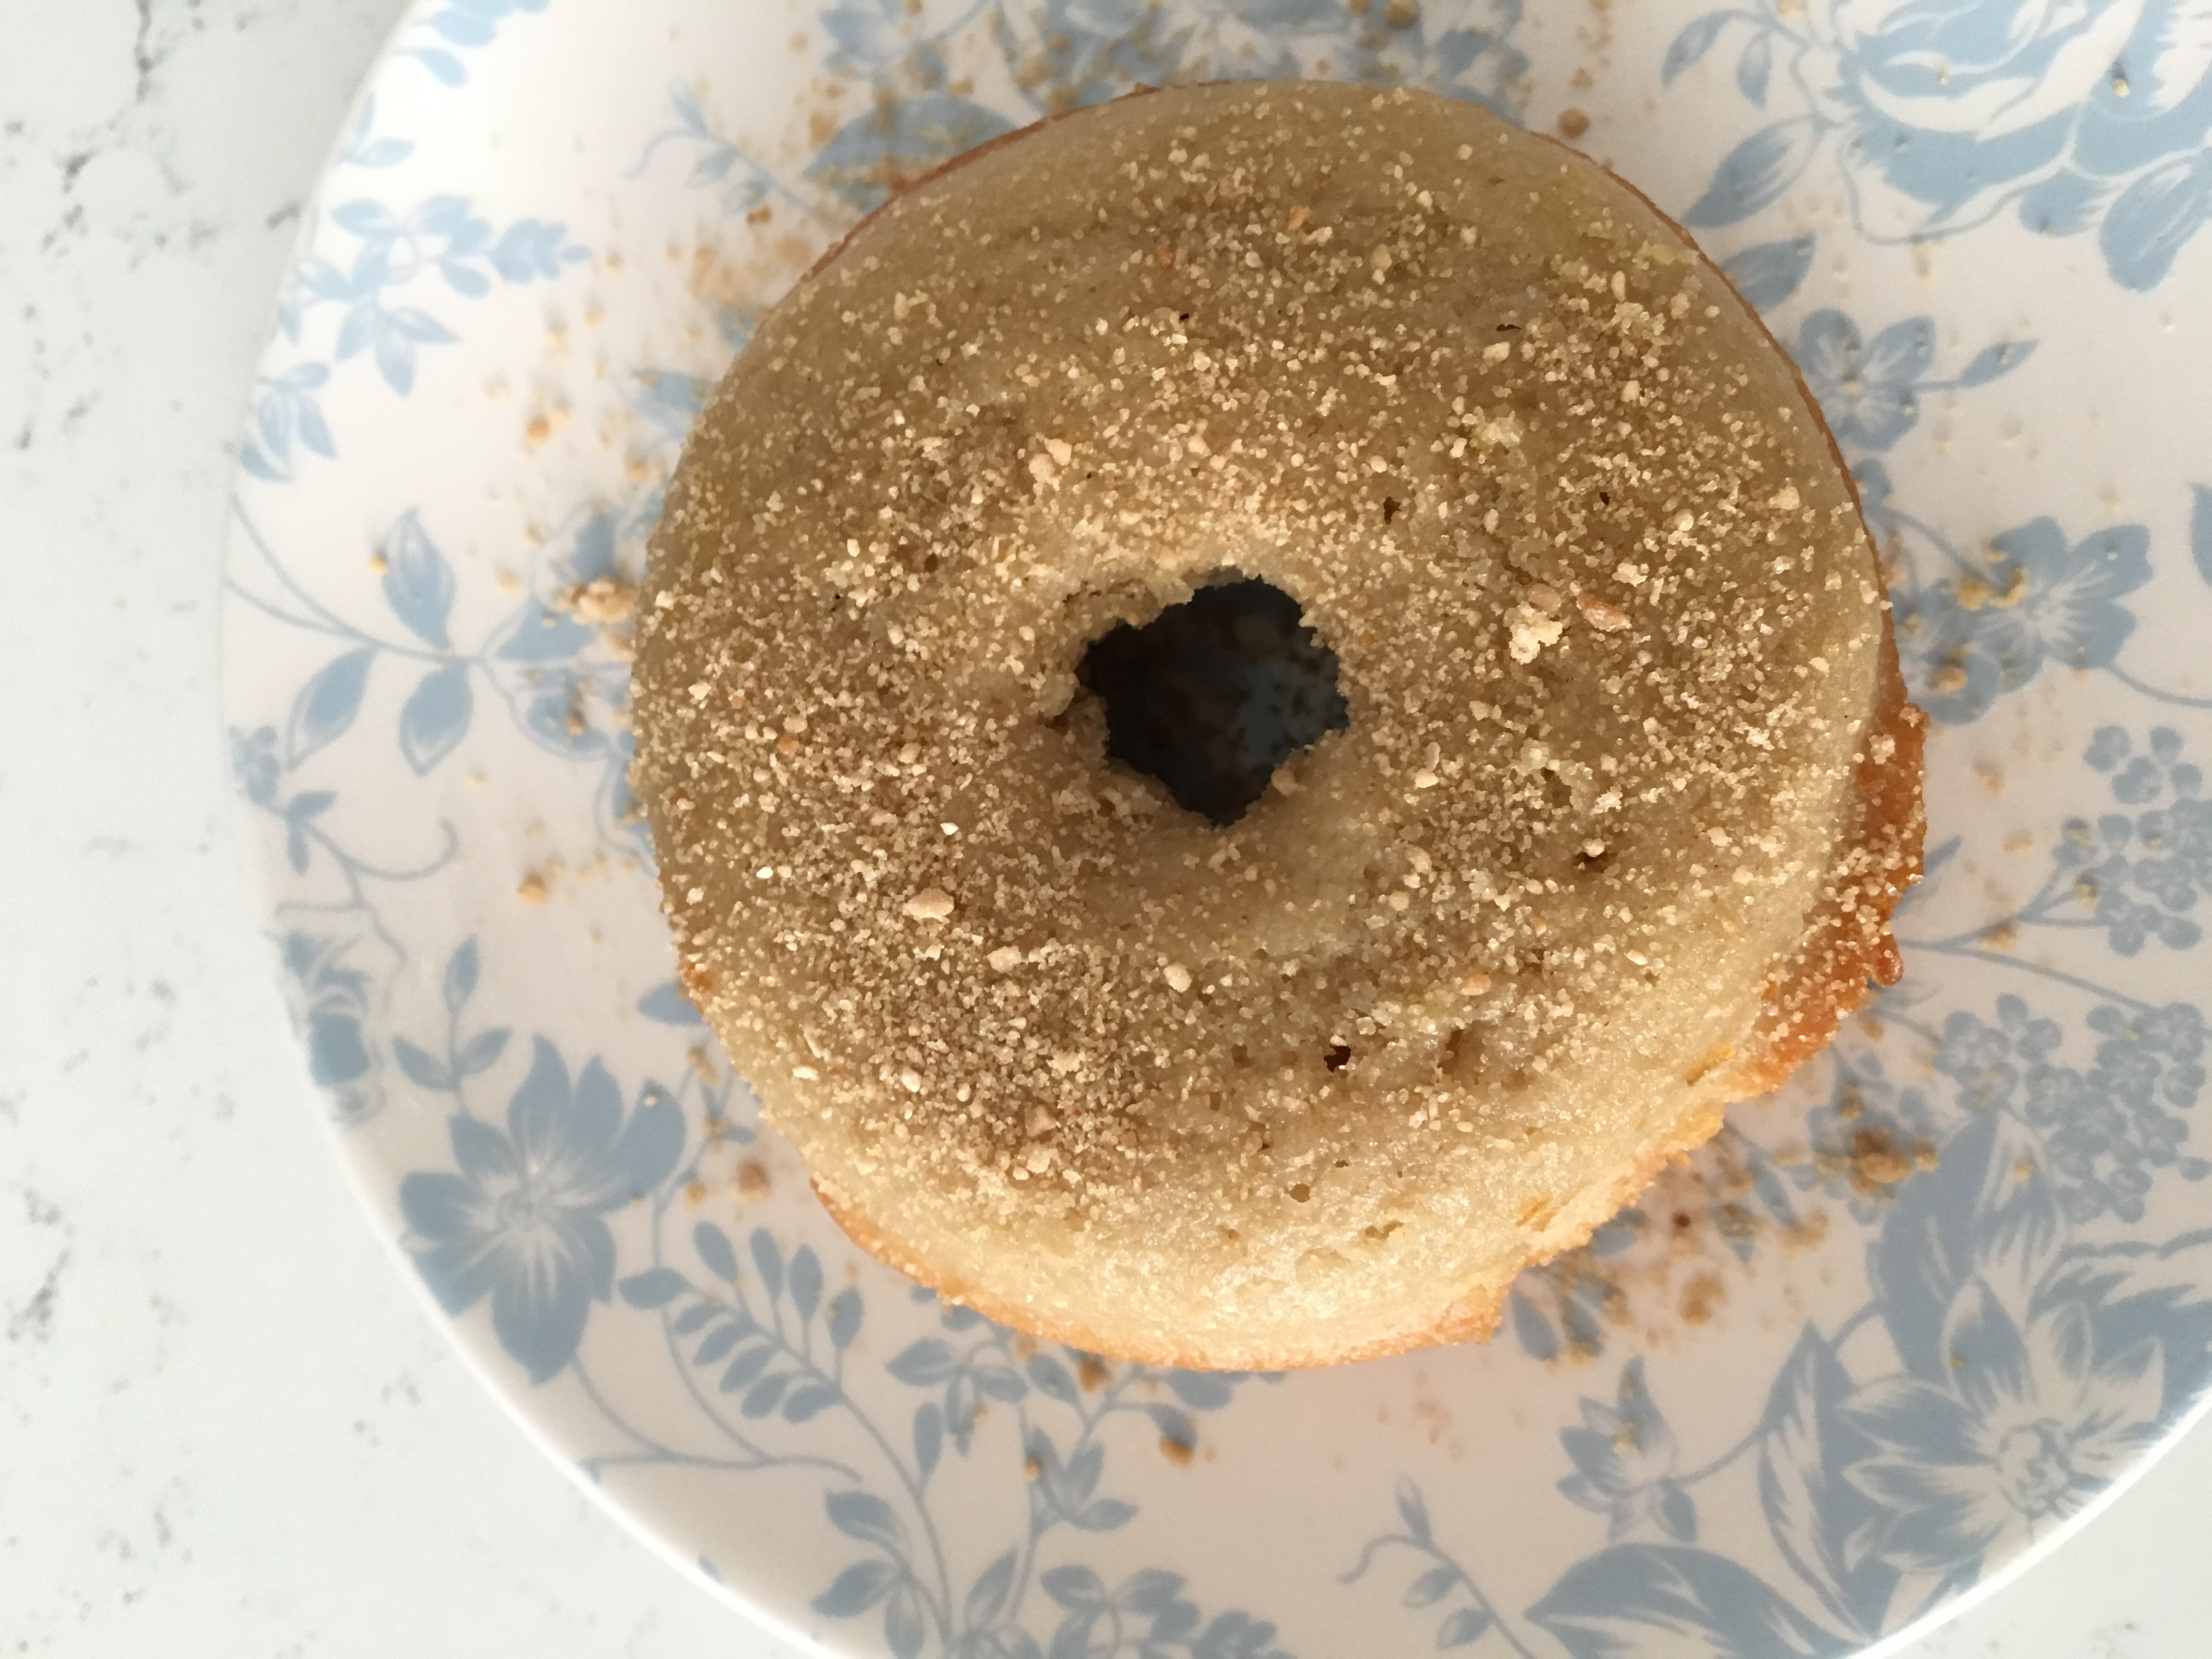
Maple-Apple Cake Donuts

Sure, pumpkin anything is bringing sexy back this fall (and all the falls) but apples have been an autumnal all-star far longer. We could do a comparison table here showcasing everything you can do with apples versus pumpkin and I bet these two tasty ingredients would be neck-and-neck, but that is too much formatting and work for me to handle before my next yoga class (truth be told). So instead, I’m going to tell you about how I turned this delicious Pumpkin Cake Donut recipe from King Arthur Flour into a Maple-Apple Cake Donut using apples I picked from my local Waters Orchard.

Growing up in Massachusetts, my favorite donuts were those powdered cake donuts from Dunkin’ Donuts which inevitably left more sugary dust on your chin and clothes than made it into your mouth. I loved the fluffy texture and sweet remnants you got to lick off your lips after the treat was done. As a nutrition coach, I tend not to eat or recommend too many donuts these days but if you’re going to do it, do it good.

The following Maple-Apple Cake Donut recipe was inspired by sweet apples and a small jar of granulated maple sugar from my parents up in New England. The ingredients did the talking, King Arthur helped me with the baseline, and my creative mind made swaps to cut back on added sugar and fuse these fluffy Os with fall flavor.

Maple-Apple Cake Donuts

MAPLE-APPLE CAKE DONUTS

Makes 12 donuts

Ingredients:

  • 1/4 cup coconut oil, melted
  • 1/2 stick of butter (or 1/4 cup), melted
  • 3 large eggs
  • 1/2 cup cane sugar
  • 1/4 cup light brown sugar
  • 2 Tbs maple syrup
  • 1 1/2 cups 15-minutes homemade apple sauce (recipe follows)
  • 1 tsp ground cinnamon
  • 1/4 ts ground nutmeg
  • 1/8 tsp ground cloves
  • 1 1/2 tsp fine sea salt
  • 1 1/2 tsp baking powder
  • 2 cups all-purpose flour, level
  • Granulated maple sugar for dusting


Directions:

  1. Preheat the oven to 350°F. Lightly grease two donut pans
  2. In a large mixer, use the flat beater attachment to combine the oil, butter, eggs, sugars, maple syrup, apple sauce, spices, salt, and baking powder until smooth. (You can also do this by hand with a little elbow grease and a whisk). 
  3. Add the flour, stirring just until smooth.
  4. Fill the wells of the donut pans about  to the top but be careful they don’t overflow.
  5. Bake for ~18 minutes, or until a toothpick inserted into the center of one comes out clean. 
  6. Remove from the oven, let cool a few minutes, loosen the edges (if need be) with a butter knife, and gently flip onto a rack to cool. 
  7. While the doughnuts are still warm generously dust them with granulated maple sugar (or cinnamon sugar).
  8. Let cool completely and store at room temperature for several days. I like to place them on a plate, stick them with toothpicks, and tent them with plastic wrap so they have room to breath.


HOMEMADE APPLE SAUCE

Ingredients:

  • 2 extra large or 3 large apples – peeled, cored and chopped
  • 1 tsp brown sugar
  • 1/2 tsp ground cinnamon


Directions:

  1. In a medium microwavable mixing bowl, combine prepped apples with sugar and cinnamon.
  2. Microwave for 3 minutes, stir, and microwave again another 3-4 minutes until apples are soft (not mushy) when pricked with a fork.
  3. Transfer to a blender or food processor and blender until mostly smooth (any little chunks will taste delicious when you bite into them).


Perfect Pork Chops

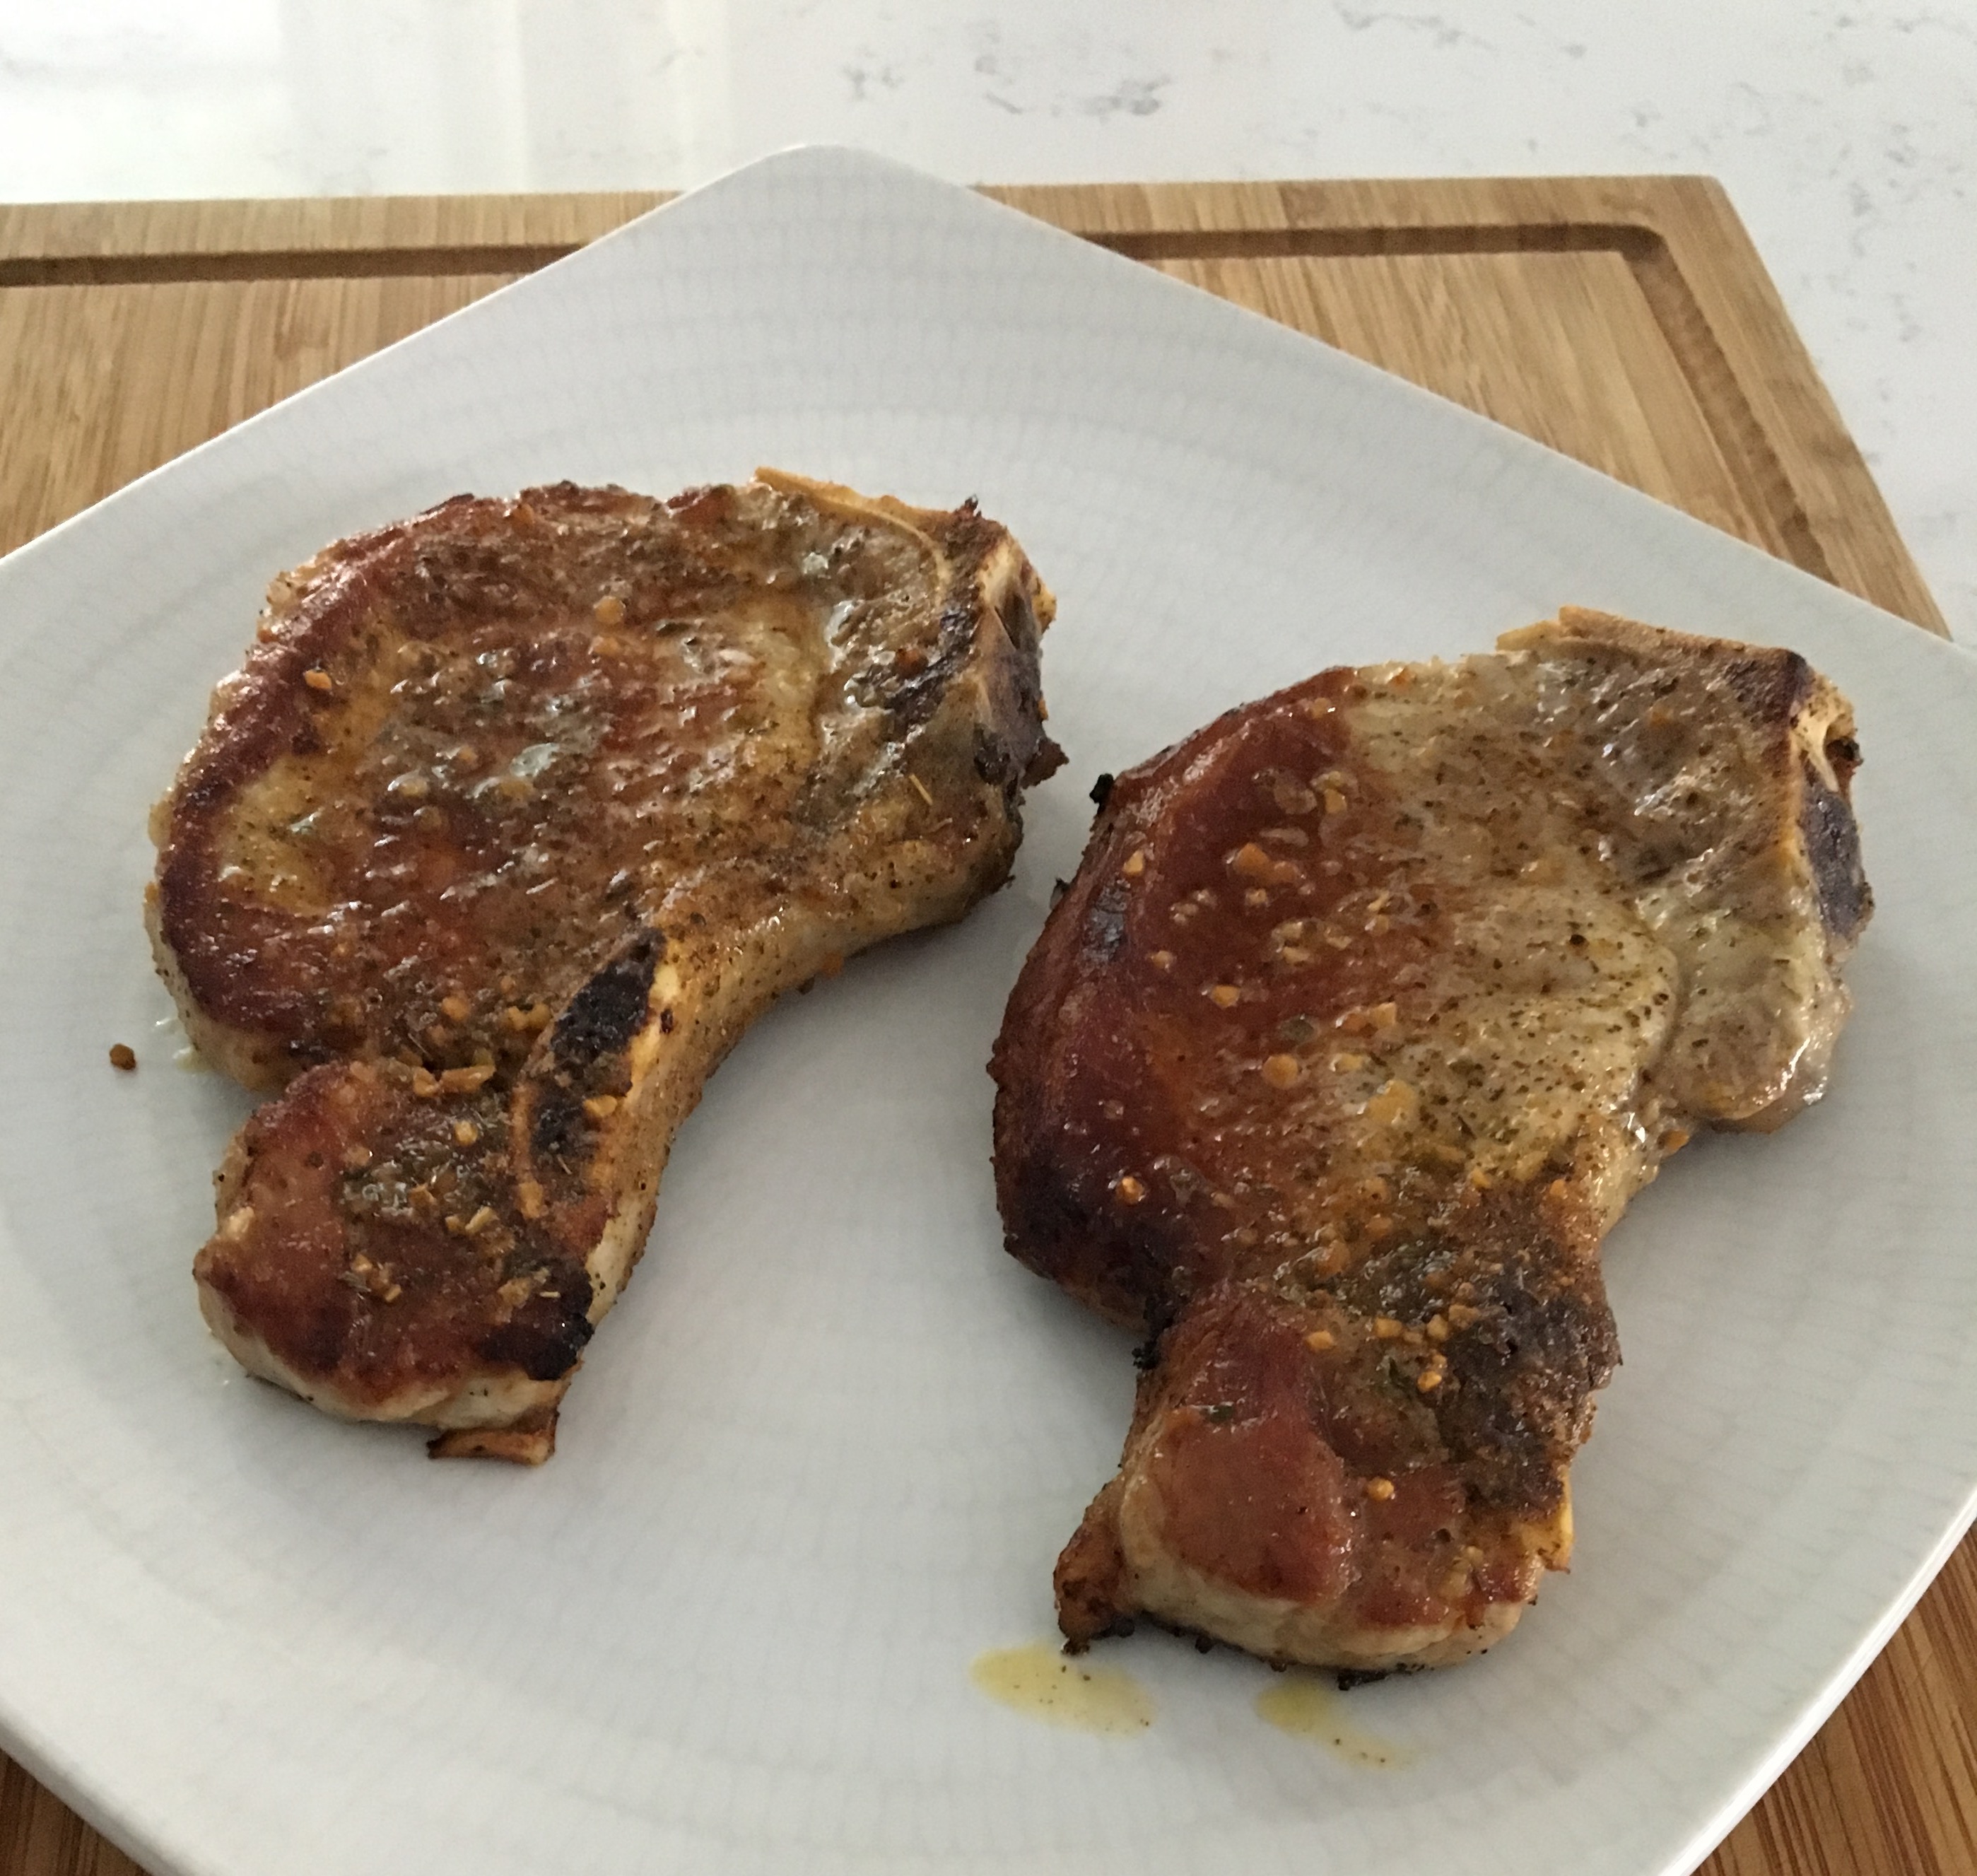
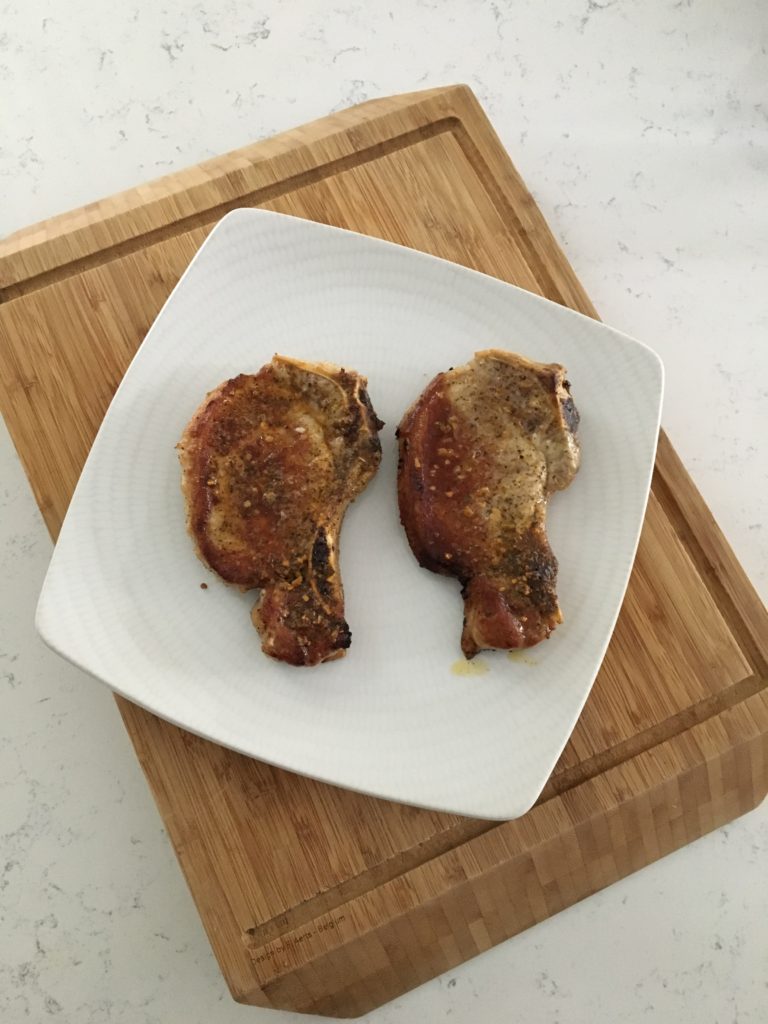
It’s getting chilly out and there is no better time to warm up with some home-cooked goodness than this sweater weather time of year. One of my favorite, grounding and nourishing dishes is seared pork chops. Pork chops are lean, delicious, easy to make, and go perfectly with all that homemade apple sauce you now have from the fall harvest. Bonus: if you have a pup, give them the bone when you’re done. They’ll love you forever (though I’m sure they already do).

img_7702

Here’s a simple, hard-to-screw-up recipe perfect for a cozy night in. Pair with roasted root vegetables and a simple sample for a healthy meal that won’t break the bank.

PERFECT PORK CHOPS

Serves 2

Ingredients:
– Two 4-6oz pork chops
– Sea salt and pepper to taste
– Olive oil for cooking

Directions:
1. Pre-heat oven to 375 F. Bring chops to room temp, pat dry and season on both sides with sea salt and pepper.
2. Pre-heat a heavy (oven safe) skillet over a medium-high flame. When hot enough a drop of water hitting the pan will hiss and steam.
3. Add 1-2 tsp olive oil and immediately add chops. Cook for 1 minute on the first side, flip and cook for 2 minutes on the second.
4. Transfer whole pan to oven and bake for 8-10 minutes.
5. Remove and let rest for at least 5 minutes on a plate or cutting board. Slice serve whole.

Garden Fresh Kale-Almond Pesto

I’m an Italian girl with Mediterranean taste buds so when summer rolls around pesto comes into the forefront of my culinary rotation. Pesto is so easy to make and can be played with endlessly. My little urban garden is currently overflowing with at least four varieties of heirloom kale and a gal can only eat so many kale chips, eat so many kale salads, and drink so many kale smoothies before she gets kale’d out. The solution to my kale fatigue? You guessed it, presto pesto!

Kale Almond Pest

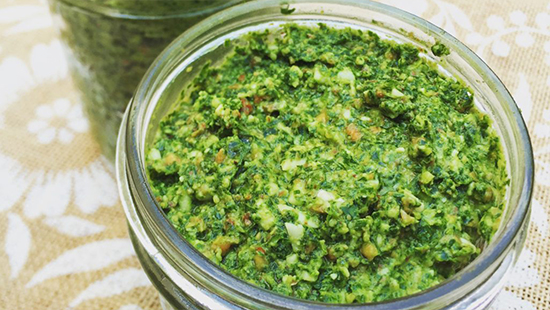
My kale pesto has the same umami goodness of a more traditional recipe, but with a little extra kick from the bittersweet taste profile of this blend of kale leaves. I used a mix of laccinato, curly, and a purple-stemmed kale whose name I don’t know but you can use whatever looks fresh and delicious. If you don’t have almonds, pine nuts or walnuts work well too.

IMG_6302

I quadrupled this recipe to make 4 quarts, which are now sitting frozen in my freezer for a crazy week when I don’t have the time to cook. These will stay fresh for up to 3 months when frozen, but I wouldn’t leave them sitting for more than a week in your refrigerator. Enjoy with eggs, grains like farro or quinoa, and of course on pasta. Green goodness in a jar – what more could you want from a summer haul!


Kale-Almond Pesto

(yields one quart)


Ingredients:

  • 6 heaping handfuls of kale (I used 22 leaves de-stemmed)
  • Juice and zest of 2 lemons
  • 2 cloves of garlic
  • 1/2 cup extra virgin olive oil
  • 1/2 cup parmesan
  • 1/2 cup dry roasted almonds

Directions:

  1. Add all ingredients to a food processor and blend until it’s an even consistency.
  2. Scrape contents into a wide mouth mason jar.
  3. Store in the fridge for up to 10 days or freezer for up to 3 months.

Spicy Mango-Coconut Popsicles

We live in a world addicted to sugar, it’s true, but going cold turkey doesn’t always work out so well. Deprivation can lead to yo-yo eating patterns, which won’t help you sustain your long-term healthy eating goals. A better approach that I often help my wellness clients take is making healthier versions of your favorite meals.

Dessert, while not the most essential of meals, is nonetheless an important food ritual many of us enjoy – and hey, life is best when enjoyed! One of my favorite challenges is finding ways to make sweets better for you without tasting like sawdust or bland ice.

IMG_6433 2

With that in mind, I recently experimented with  a Mango Coconut Popsicle recipe, spiced with ginger. Ginger is a superfood linked to relieving nausea, inflammation, pain and a whole host of digestive issues. I also threw some turmeric in there because, well, why not? It too has anti-inflammatory properties and might help your skin and joints look and feel their best.

This fast and tasty recipe is guilt-free and impossible to mess up. Bonus: any leftovers that won’t fit in your molds can be enjoyed on the spot as a healthy smoothie. Enjoy!

IMG_6431 2


Spicy Mango-Coconut Popsicles

Servings: 6-8 popsicles


Ingredients:

  • 1 1/2 cups frozen mango
  • 1/2 very ripe banana
  • 1” fresh ginger, peeled
  • 1/2” fresh turmeric, scrubbed
  • 1/2 cup whole fat plain yogurt
  • 1/3 cup toasted coconut flakes
  • 8 oz unsweetened almond milk


Directions:

  1. Blend ingredients in a high-speed blender for 1 minute or until smooth.
  2. Pour into popsicle molds leaving about a 1/4” at the top. Any leftovers can be consumed like a smoothie – yum!
  3. Freeze for at least 3 hours, but ideally overnight.

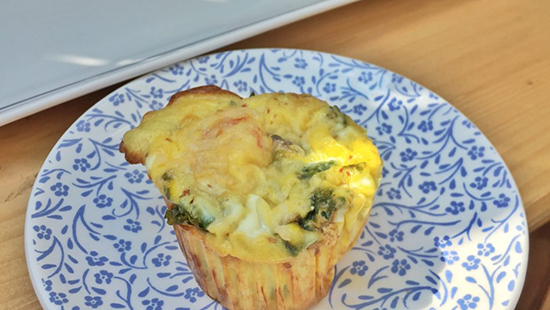
Big Batch Breakfast (Part Deux): Healthy Veggie & Cheese Egg Muffins
Breakfast just got a whole lot easier. If you’re on the go as much as I am, it always pays off to spend a little extra time over the weekend to prepare some grab-and-go meals that will keep your full and focused throughout the week no matter what calendar cluster-Fs may arise.

For the past two weeks I’ve been making a big batch of healthy egg muffins on Sunday afternoosn, switching up the vegetables and accoutrements to keep things interesting. Below you’ll find my current favorite, but you can check my Instagram account for a recipe with asparagus, summer corn, and grape tomatoes. You can’t go wrong with either!

Healthy Baked Egg MuffinsBig Batch Breakfast (Part Deux): Healthy Veggie & Cheese Egg Muffins
Makes 12 egg muffins, or 6 servings.

Ingredients:

  • Butter, coconut oil or nonstick cooking spray, to coat pans – or, use silicone baking cups
  • 8 large eggs
  • Splash of milk (can use nut milk if preferred)
  • Generous pinch of sea salt and ground pepper
  • 2 sprigs of fresh thyme, de-stemmed and minced
  • 2 tsp olive oil
  • 2 cups kale, cut into thin ribbons
  • 1/2 cup sweet & spicy cherry peppers
  • 1/2 large red onion, finely chopped
  • 1 clove of garlic, minced
  • 3/4 – 1 cup shredded parmesan

Directions:

  1. Preheat the oven to 350°F.
  2. Crack eggs into a large bowl and whisk with the milk, thyme, salt and pepper.
  3. Grease a 12-cup muffin pan as desired.
  4. Sauté red onion in olive oil for 5 minutes over medium-high heat with a pinch of salt. Add kale, sweet and spicy pepper, and garlic and sauté another 5-7 minutes.
  5. Divide veggie mixture and cheese between each muffin cup, then carefully pour eggs in until muffin tins are almost full – leaving about a 1/4-inch space.
  6. Bake for 20-25 minutes or until a wooden pick inserted in the center of a muffin comes out clean. The egg muffins will look like soufflé when they come out of the oven, but they will sink after a few minutes. Let them cool for a few minutes before using a rubber spatula to carefully remove each muffin.

Notes:

  1. Adapted from Popsugar.
  2. You can consume these immediately or let them cool, then transfer to a resealable plastic bag. They’ll refrigerate well for up to a week or freeze for up to three months.


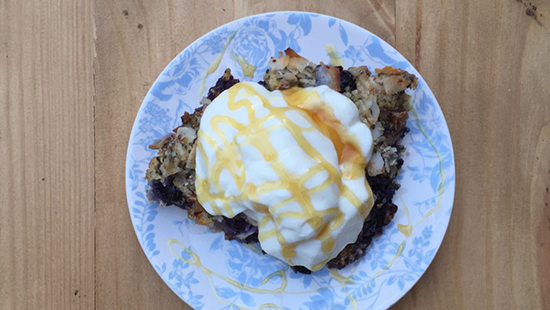
Big Batch Breakfast: Blueberry Coconut Baked Oatmeal

Let’s face it, oatmeal can get pretty boring, but oats are so good for you – loaded with heart-healthy fiber and minerals. What to do?! Get baked. Err, get baking!

My baked oatmeal is super easy, cost-effective, and since it’s a big batch recipe you’ll be set for breakfast all week. Convenience – check! Taste – check! Healthy – check!

Plate of Blueberry Coconut Baked Oatmeal

Even if you don’t typically dig oatmeal, give this method a try. It changes the texture and fuses the flavors so you might just feel like you’re eating dessert, all the while you’re fueling yourself with clean energy for an active day. And best of all, there’s no added sugar so there’s no guilt with this breakfast decadence.

Go on, shake up your morning meal. It’s good to the last bite!


Blueberry Coconut Baked Oatmeal

Prep time: 10 mins Cook time: 40 mins Total time: 50 mins
Serves: 8 servings

Ingredients:

  • 1/2 cup roasted, unsalted pecan pieces
  • 1/2 cup toasted, unweetened coconut flakes
  • 1/2 cup hulled hemp seeds
  • 1/4 cup chia seeds
  • 2 1/2 cups old-fashioned oats
  • 1 Tbs ground cinnamon
  • A pinch of fine-grain sea salt
  • 2 cups fresh blueberries (frozen will work too – just defrost and discard any liquid)
  • 2 1/2 cups unsweetened almond milk
  • 2 large eggs
  • 2 Tbs melted coconut oil
  • 1 tsp vanilla extract
  • Optional toppings for serving: plain yogurt, maple syrup or honey for drizzling, and/or more fresh fruit

Directions:

  1. Preheat the oven to 375 degrees. Grease a 9×13-inch rectangular baking dish with butter or coconut oil.
  2. In a medium mixing bowl, combine the oats, nuts, coconut flakes, hemp seeds, chia seeds, cinnamon and salt. Whisk to combine.
  3. In a smaller mixing bowl, combine the almond milk, eggs, coconut oil and vanilla. Whisk until blended.
  4. Spread the berries evenly over the bottom of the baking dish then cover the fruit with the dry oat mixture. Drizzle the wet ingredients over the oats. Use a spatula in zig-zagging strokes across the surface of the wetted oats to smooth out the top and push any dry oats down.
  5. Bake for approximately 45 minutes, or until the top is golden (not burnt!). Remove your baked oatmeal from the oven and let it cool for a few minutes before cutting and serving.
  6. Serve with yogurt and a drizzle of honey for a more decadent and delicious breakfast experience!

Notes:

  1. This recipe will keep well in the refrigerator for up to 7 days.
  2. Recipe adapted from Cookie & Kate.

Rosewater Raspberry Gluten-Free Scones

I highly recommend taking a long weekend with friends, yummy food, and outdoor walks in the sunshine; and without a computer or to do list. Like highly recommend it. I recently did just this up in NYC with some of my dearest girl friends with whom (is that proper grammar??) I studied abroad nearly 10 years ago. Damn, the years are flying by! Anyways…


We had a ball! Despite bopping around a bunch like an itinerant little gypsy, the weekend wasn’t stressful at all. Leaving my computer at home certainly helped, but mostly it was my lack of an agenda – something I struggle to let go of in my daily DC grind – that created space and time to do everything I needed and wanted with flexibility and a sense of ease.


Here are some highlights…


On Saturday, I went to the Union Square Famers Market (amazing) and gawked at peonies the size of my face and farm-fresh eggs that looked like the most beautiful golden nuggets I’ve ever seen. I would have stayed there the whole day if it weren’t for the sweltering heat and sweaty mess I had quickly become.


IMG_5245

IMG_5242


Sunday, was a day filled with jamm, which means “peace” in Wolof, Senegal’s native tongue. The girls and I throw that word around a lot when we’re together since Dakar was our study abroad destination and jamm was our main objective while there.


All day I was surrounded by these four mighty and magnificent women who inspire, nurture and love me to no end. How lucky am I? Together, we made a version of the gluten-free scones you’ll see below as well as some delicious frittatas.


Food is always best when made with love and enjoyed in good company. All of that was abundant and then some. We gabbed for hours while dining al fresco on a Brooklyn co-op rooftop. Heaven on earth.


IMG_5301


I rounded out the weekend spending time with one of my other very best friends from childhood, Court. Actually, let’s call her my sister. Much more appropriate for our bond. We’ve known each other since age four and no matter how long we go in between visits, it feels like we’ve never skipped a beat.


While waiting for her arrival at an amazing Jewish Deli somewhere in lower Manhattan, I decided to express my joy for a weekend well spent with a little urban hand-standing. What else is a yogi to do?


IMG_5265


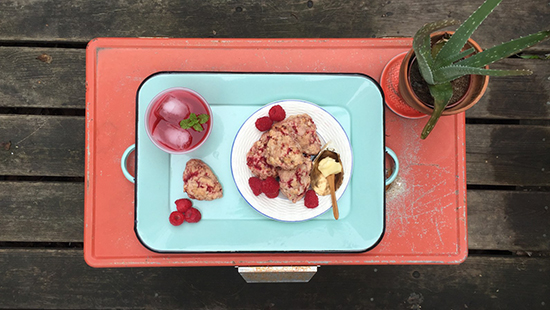
I could regal you with all the mundane details of what made that weekend so magical in my mind, but instead I’ll simply suggest you try out these Rosewater Raspberry Scones and taste for yourself some of the love and jamm I brought back with me from NYC.


IMG_5305

Rosewater Raspberry Gluten-Free Scones

Makes ~16  2 1/2-3″ scones.
Ingredients:
  • 2 1/2 cups Bob’s Red Mill Gluten-Free Biscuit Mix
  • 1/2 cup Gluten-Free Rolled Oats
    3/4 cup 2% or Whole Milk (note: you can substitute 1/2 cup unsweetened almond milk + 1/4 cup plain coconut milk yogurt to make this vegan)
  • 10 Tbs butter, cold and cubed
  • 1/4 cup Rosewater
  • 1 large egg
  • 1/3 cup cane sugar
  • Zest of one lemon
  • 1 1/2 cups fresh raspberries
  • Optional: 2-3 Tbs Milk for basting
  • Optional: sprinkle of corse sea salt

Directions:

  1. Preheat oven to 350 degrees Fahrenheit.
  2. Combine dry ingredients in a large bowl. Blend with butter cubes using a pastry cutter. You can also use your finger to pinch the butter into the flour mixture if you don’t have one.
  3. In a separate smaller bowl, whisk together milk, egg, rosewater, zest and sugar.
  4. Combine the wet and dry ingredients in the larger of the two bowls. Knead with your hands until dough is combined. It may be a bit chunky/flaky, but that’s good for scones.
  5. Fold in raspberries until evenly distributed.
  6. Shape into small round disks, approximate 2 – 2 1/2″ in diameter. Place on a lined baking sheet 1″ apart.
  7. Baste raw biscuits with a smear of milk, then sprinkle lightly with corse sea salt.
  8. Bake at 350 degrees for 22-26 min, or until the tops turn golden and a toothpick comes out clean.

Sweet and Tangy Tandoori Chicken Thighs

Need an easy weeknight dinner idea that won’t leave you wanting for flavor? This past week was a crazy one for me but it doesn’t mean a girl doesn’t still need something tasty, homemade and nutritious to restock the tank at the end of the day. For me, roasted chicken always hits the spot when I crave something cozy, satiating and convenient.


From start to finish, this easy recipe for chicken thighs takes under 30 minutes. It’s delicious served hot, but leftovers can be easily stored for lunch or dinner throughout the busy work week. Pair it with a side kale salad and roasted veggies for a filling, healthy and budget-friendly dinner perfect for a small gathering, family meal or broken down into several individual servings (batch-cooking style) for one.


Sweet and Tangy Tandoori Chicken Thighs

(makes 4-5 servings of protein)

Ingredients

For the Chicken

  • 4-5 chicken thighs, bone in and skin on
  • 3-4 Tbs grapeseed oil
  • Salt and pepper to taste


For the Marinade

  • 1 Tbs Tandoori Seasoning Blend (Penzey’s)
  • 1 Tbs Pomegranate Molasses
  • 3 Tbs Grapeseed Oil
  • 1/4 cup Red Wine Vinegar
  • 1 Tbs Tomato Paste
  • Pinch of Sea Salt


Directions

For the Chicken

  1. Pre-heat over to 350 F.
  2. Heat an oven-safe sauté pan over high heat. Add 3-4 Tbs grapeseed oil.
  3. Bring chicken thighs to room temp. Pat dry. Season chicken on both sides with salt and pepper.
  4. Start chicken skin side down in pan. Cook untouched for 5 minutes. Flip and cook another 4 minutes.
  5. Pour marinade over chicken thighs, coating evenly. Transfer to oven and bake for 10 minutes.
  6. Remove and let sit at least 5 minutes before serving.


For the Marinade

  1. Add all ingredients to a mason jar or air tight container and shake vigorously until combined.


Thai Coconut Lemongrass Soup with Shrimp

When you know you’re about to get snowed in, it helps to have a plan for what you’re going to eat when you’re all cooped up. Once it became clear that DMV meteorologists had actually gotten predictions for the Jonas Blizzard right, we knew we were in for a doozy. Queue the mass rush to grocery stores and empty shelves in the days leading up to any actual precipitation. Thanks to my abnormal, self-employed schedule I got to hit up the grocery stores when there weren’t as many folks there and get all the ingredients I needed to bring my culinary vision to life. My biggest meal prep take-away? Plan ahead and get it done early so you don’t have holes in your pantry or refrigerator.

For me it wasn’t hard to decide on a menu, but if you struggle with that it helps to scour your favorite food blogs for ideas. I knew I wanted to make soul and belly warming meals that would make forced nights in feel special. I also needed them to be hearty enough to refuel us after all our shoveling.

Night one was a really tasty (and pretty spicy) Thai coconut lemongrass soup which I’ve mapped out for you below. The following night was pan-seared chicken thighs with caramelized onions, roasted beets and a side of sautéed mushrooms and kale. Breakfasts were protein-heavy. One morning we did eggs in a hole (so much fun if you’ve never tried) and the next we lightened things up with green smoothies. Warm, hearty, and healthy meals. Check, check!

IMG_3877

Thai Coconut Lemongrass Soup with Shrimp

Makes 4 meal-sized portions


Ingredients:

  • 1 – 14 oz can full-fat coconut milk
  • 1 – 14 oz can “lite” coconut milk
  • 2 cups chicken or vegetable stock
  • 1 Tbs coconut oil
  • 2″ grated fresh ginger root
  • 2 cloves of garlic
  • 1 Tbs red chili paste
  • 1/2 large red onion, peeled and finely diced
  • 2 stalks dried lemongrass
  • 1 red pepper,  finely diced
  • 2 cups brown, white or shiitake mushrooms, rinsed, dried and sliced
  • 2 lbs large uncooked shrimp, tail-on
  • 1/2 cup cilantro
  • 1/2 cup toasted cashew pieces
  • 2 limes
  • 1 serrano pepper, seeds removed and sliced thinly
  • 2 cups cooked brown rice (optional: make a blend of brown rice, quinoa and amaranth for a more hearty flavor)

Directions

  1. In a large, heavy-bottom pot, sauté the ginger, garlic, Thai chili paste and red onion in coconut oil over medium heat for approximately 5 minutes, or until the onion is tender. Season to taste with salt.
  2. Add in coconut milk, stock and lemongrass and bring to a low boil. After a 3-5 minutes, add the red pepper and mushrooms. Cook another 3 minutes, then add the shrimp and cook for another 3-4 minutes or until the flesh of the shrimp is opaque.
  3. Spoon a 1/2 cup of rice into each bowl and ladle soup over it. Squeeze half a lime over each serving. Garnish with fresh cilantro, toasted cashew pieces and hot pepper slices to taste.

Healthy Slow Cooker Chicken Chili

Let’s face it, who wants to cook after all the work that goes into preparing a Thanksgiving feast. Even if you weren’t one of the culinary artists toiling away in the kitchen, you too may also be suffering from post-holiday food fatigue (no thanks to the L-Trytophan found in turkey). We still have to eat though so why not prepare something that’ll last, or even get better by the day and only takes 10 minutes hands-on time?

Queue the slow cooker. There are countless ways to use the slow cooker from a hearty-yet-healthy lentil soup to the more decadent french toast method. Chili’s are no stranger to the slow and low method but since I try not to consume too much red meat, I thought I’d give chicken chili a try. Of note, I used chicken thighs in this recipe to keep the cost low but if you wanted to go for an even leaner chili, stick to chicken breast.

IMG_3360

Most importantly, this recipe passed the Tilly Taste Challenge. Okay, so maybe a dog isn’t the best judge of a meal’s flavor and complexity, but her hound nose can’t lie – it smells darn good! Try it for yourself and let me know what you think.

Healthy Slow Cooker Chicken Chili

Makes 6-8 servings | Hands-on time: 10 minutes | Total time: 5-7 hours

Ingredients:

  • 1 15-oz can pinto beans, drained
  • 1 15-oz can black beans, drained
  • 1 28-oz can crushed tomatoes
  • 2 cups chicken stock
  • 4 boneless, skinless chicken thighs
  • 1 Tbs cajun creole seasoning
  • 1 Tbs cumin
  • 1/4 cup apple cider vinegar
  • 1/4 cup olive oil, divided
  • 2 heaping Tbs pickled jalapeños
  • 4 cloves of garlic, minced
  • 1 white onion, diced
  • Salt and pepper to taste

Directions:

  1. Sauté onions and garlic in 1 Tbs olive oil until tender and translucent (about 5-7 minutes.)
  2. While they’re cooking rinse and drain your beans in a large colander and pull everything else out so it’s ready to go.
  3. Transfer onions and garlic to your slow cooker and add all other ingredients (be sure to use the liquid from your tomatoes), submerging chicken thighs completely.
  4. Cook on low for 5-7 hours, or until your chicken thighs pull apart easily with a couple of forks shredding in opposite directions.
  5. Adjust for seasoning and add extra salt, pepper, spices or heat as desired.
  6. Serve plain or top with a dollop of greek yogurt, sliced green onion, and your favorite hot sauce.

IMG_3358