10-Day (Moderate) Cleanse

I’ve wanted to try a detoxifying cleanse for some time now, but just couldn’t wrap my head around trying to function while only consuming some purportedly magical concoction of water, lemon, maple syrup and cayenne pepper in an attempt at pursuing the so-called  Master Cleanse. If you’re like me and lead an active and busy lifestyle, it would be nearly impossible to follow most detox programs without feeling drained or hangry the entire time.

Moderation and feasibility in mind, I’ve devised a cleanse that keeps it real and keeps you functional.  I am not a nutritionist (yet!) or doctor, but I have done my fair share of research. The first two days of this cleanse are 100% raw–intended to scrub out your digestive track the natural way–and all but the final day are in keeping with a vegan diet.

This is a great way to give your system a reset as the seasons change. That being said, while following this please listen to your body. It’s normal to feel hungry at times (especially during days 1-4), but do not starve yourself. If your body is telling you to increase portion sizes, do it. Also, WARNING: do not work out during the first two days of this cleanse as there is little to no protein. I don’t want you doing damage to your muscles. If you desperately need to exercise days 1-2, do some restorative yoga, stretching, or take a long walk. Mainly, avoid any high-impact activities, weight training, or isometric training.

THE PROGRAM:

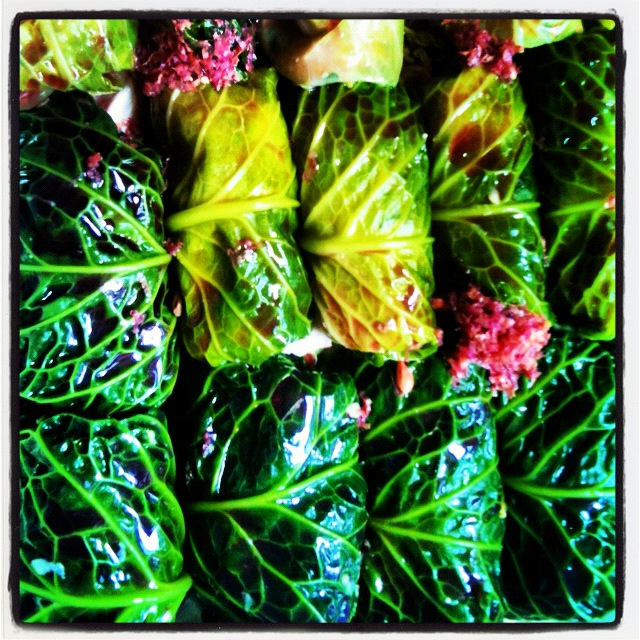
(The meals below are guidelines. Feel free to use the fruits, veggies, nuts, and whole grains you like best. For example, if you can’t find kale, use any other dark leafy green.)

Day
           Allowed Suggested Meals
1 whole fruits &veggies
  • Breakfast: blueberry beet smoothie w/ grated ginger and lemon
  • Snack: apple w/ cinnamon
  • Lunch: baby arugula w/ mushrooms, grape tomatoes, cucumbers, yellow bell peppers, carrots
  • Snack: ½ avocado w/ apple cider vinegar
  • Dinner: ½ roasted squash w/ diced onions & cayenne inside; steamed broccoli
  • Dessert: 5-6 figs (or any sweet, whole fruit)
2  whole fruits &veggies
  • Breakfast: blueberry beet smoothie w/ grated ginger and lemon
  • Snack: apple w/ cinnamon
  • Lunch: baby arugula w/ mushrooms, grape tomatoes, cucumbers, yellow bell peppers, carrots
  • Snack: ½ avocado w/ apple cider vinegar
  • Dinner: ½ roasted squash w/ diced onions & cayenne inside; steamed broccoli
  • Dessert: 5-6 figs (or any sweet, whole fruit)
3 whole fruits &veggies; and seeds & nuts
  • Breakfast: pineapple banana kale smoothie w/ ground flaxseed
  • Snack: orange slices
  • Lunch: baby spinach, 2 tbs walnuts, 1 tbs pumpkin seeds, strawberries, mushrooms
  • Snack: ¼ cup raw almonds (unsalted)
  • Dinner: grilled eggplant, portobella mushroom, and red pepper skewers; side spinach salad w/ sunflower & pomegranate seeds (apple cider vinegar for dressing)
  • Dessert: raspberries (or any sweet, whole fruit)
4  whole fruits &veggies; and seeds & nuts
  • Breakfast: pineapple banana kale smoothie w/ ground flaxseed
  • Snack: orange slices
  • Lunch: baby spinach, 2 tbs walnuts, 1 tbs pumpkin seeds, strawberries, mushrooms
  • Snack: ¼ cup raw almonds (unsalted)
  • Dinner: grilled eggplant, portobella mushroom, and red pepper skewers; side spinach salad w/ sunflower & pomegranate seeds (apple cider vinegar for dressing)
  • Dessert: raspberries (or any sweet, whole fruit)
5 whole fruits &veggies; and seeds & nuts; and beans
  • Breakfast: mixed berries w/ 2 tbs soaked chia seeds, slivered raw almonds, and almond milk (substitutes: coconut, soy or hemp milk )
  • Snack: apple w/ cinnamon
  • Lunch: arugula w/ roasted root veggies (roasted w/ only coconut oil)—carrots, parsnips, sweet potato, red onion
  • Snack: baby carrots & homemade white-bean hummus
  • Dinner: warm lentil salad w/ chickpeas
  • Dessert: ½ mango w/ cayenne (optional)
6  whole fruits &veggies; and seeds & nuts; and beans
  • Breakfast: mixed berries w/ 2 tbs soaked chia seeds, slivered raw almonds, and almond milk (substitutes: coconut, soy or hemp milk )
  • Snack: apple w/ cinnamon
  • Lunch: baby arugula w/ roasted root veggies (roasted w/ only coconut oil)—carrots, parsnips, sweet potato, red onion
  • Snack: baby carrots & homemade white-bean hummus
  • Dinner: warm lentil salad w/ chickpeas
  • Dessert: ½ mango w/ cayenne (optional)
7  whole fruits &veggies; and seeds & nuts; and beans
  • Breakfast: mixed berries w/ 2 tbs soaked chia seeds, slivered raw almonds, and almond milk (substitutes: coconut, soy or hemp milk )
  • Snack: apple w/ cinnamon
  • Lunch: baby arugula w/ roasted root veggies (roasted w/ only coconut oil)—carrots, parsnips, sweet potato, red onion
  • Snack: baby carrots & homemade white-bean hummus
  • Dinner: warm lentil salad w/ chickpeas
  • Dessert: ½ mango w/ cayenne (optional)
8  whole fruits &veggies; and seeds & nuts; and beans; and whole grains
  • Breakfast: oatmeal (or quinoa) w/ fresh blueberries, cinnamon, 2 tbs chia seeds (or ground flaxseed) and 1 tsp maple syrup
  • Snack: orange slices
  • Lunch: kale salad w/ chickpeas
  • Snack: ½ avocado w/ apple cider vinegar
  • Dinner: warm quinoa salad w/ grilled eggplant
  • Dessert: ½ mango w/ cayenne (optional)
9  whole fruits &veggies; and seeds & nuts; and beans; and whole grains
  • Breakfast: oatmeal (or quinoa) w/ fresh blueberries, cinnamon, 2 tbs chia seeds (or ground flaxseed) and 1 tsp maple syrup
  • Snack: orange slices
  • Lunch: kale salad w/ chickpeas
  • Snack: ½ avocado w/ apple cider vinegar
  • Dinner: warm quinoa salad w/ grilled eggplant
  • Dessert: pear slices (or any sweet, whole fruit)
10  whole fruits &veggies; and seeds & nuts; and beans; and whole grains; and eggs
  • Breakfast: egg-white omelette with spinach, tomato, mushroom & spices; ½ avocado sliced
  • Snack: ½ cup mixed berries
  • Lunch: kale salad w/ chickpeas
  • Snack: ¼ cup raw almonds (unsalted)
  • Dinner: warm quinoa salad w/ 1 poached egg
  • Dessert: pear slices (or any sweet, whole fruit)

Suggested Shopping List:

  • Salad greens: baby arugula and spinach
  • Salad fixings: mushrooms, (grape) tomatoes, cucumbers, bell peppers (any color), carrots, avocados, and any other raw veggies you like
  • Meaty veggies: eggplant, portobello mushrooms
  • Fruits: blueberries, strawberries, raspberries, bananas, apples, oranges, mangoes, pineapple, pears, peaches, plums, figs, etc
  • Hearty greens: kale (mustard greens, collard greens and swiss chard work too)
  • Root vegetables: parsnips, turnips, sweet potatoes, beets, carrots
  • Squash: butternut and acorn
  • Nuts (all unsalted, raw): almonds and walnuts preferrably
  • Seeds (all unsalted, raw): pumpkin, sunflower, chia (whole or ground), flax (ground)
  • Whole grains: quinoa and oatmeal (other good ones include faro & barley)
  • Proteins: pinto, kidney, black, or butter beans; lentils; chickpeas; eggs
  • Flavoring: onions, garlic, ginger, cinnamon, cayenne pepper, and any other spices you like
  • Acids: lemons, apple cider vinegar
  • Oils: coconut oil (or cold-pressed extra virgin olive oil if you can’t find that)
  • Sweeteners: maple syrup (or raw honey)
  • Beverages: unsweetened green, white, and herbal teas; water!
  • Liquids: almond, hemp, coconut or soy milk

The No-Nos:

  • Salt
  • Coffee and black tea
  • Sugar (except small quantities of maple syrup or raw honey)
  • Oils (except small quantities of coconut oil or cold-pressed extra virgin olive oil)
  • Refined Starches (a.k.a. “empty calories” like white bread)
  • Booze (sorry kids–if you need a little sauce before going out, try kombucha)

I’ll be sharing recipes and insights over the course of the next 10 days, so stay tuned!

Easy Multigrain Bread

Adapted from the New York Times infamous No-Knead Bread recipe, I started making my own version of this beautiful, easy homemade bread on the regular two years ago. This rustic bread is truly reminiscent of a French-style boule, which in my mind is as good as it gets. I love it’s crunchy crust and fluffy, air-pocked interior. It’s great for toast and even better for breakfast sandwiches!

Amy’s Easy Multigrain Bread:

What you’ll need:

  • 2 ¼ cups unbleached bread flour
  • 1/2 cup whole wheat all-purpose flour
  • 1/2 cup almond meal
  • ¼ cup ground flaxseed
  • 1 3/4 cups water
  • 1/2 tsp instant/rapid-rise yeast
  • 2 tsp salt
  • Rolled oats for a finishing touch

Note: You’ll also need a 6-quart heavy covered pot (cast iron, enamel, Pyrex or ceramic). I use my trusty 5 1/2 quart Cuisinart dutch-oven and it does the trick!

How to make it:

  1. In a large bowl combine flours, almond meal, ground flaxseed, yeast and salt. Add 1 3/4 cups warm water and mix–using your hands–until it just comes together. The dough will be shaggy and sticky.
  2. Seal the bowl with plastic wrap and let dough rest for 12-18 hours.
  3. Sprinkle flour on a work surface and place your dough on it. Dust your dough with a touch more flour then fold it in on itself gently three to four times.  Cover it loosely with plastic wrap and let rest about 15 min.
  4. Using a little flour to keep your dough from sticking too much, gently and swiftly shape your dough into a ball. Generously coat a cotton dish towel with rolled oats, put the dough seam side down on the towel and dust the top with more oats. Cover with another cotton towel and let it rise for 2 hours. When it is ready, your dough will be more than twice it’s original size.
  5. A half-hour to 45-min before your dough is ready, pre-heat your oven to 500°F. Place a 6-quart heavy covered pot in your oven as it heats up (lid on).
  6. When your dough is ready (i.e. 2 hours have passed since you coated it in oats), carefully remove the pot from your oven. Slide your hand under the towel and turn your dough over into the heated pot, seam side up. Give the pan a good shake once or twice if you had a bad flip and your dough is unevenly distributed. No worries, it’ll sort itself out while cooking.
  7. Cover your pot with its lid and bake for 30 min, then remove the lid and bake for another 15 min until the loaf is golden brown. Let your boule cool on a rack for at least 20 min before diving in. Then, bon apetit!
Over-easy egg sandwich with arugula, lemon aioli, bacon and Frank’s Red Hot.

For a video tutorial on how to make the original recipe (i.e. just white bread flour) check out this video on YouTube.

Blueberry Banana Muffins

If you liked my healthy Banana Bran Muffins, you’re going to love these Blueberry Banana Muffins. Like that recipe, this one is made dairy-free by substituting banana for oil or butter, and almond milk for yogurt or cow’s milk. If you don’t have lactose issues I’d skip the almond milk substitution and use non-fat, plain Greek yogurt for a slight protein boost.

These muffins are easy to make, friendly on your waistline, and yummy to boot. Three of my fabulous lady friends tried them out a few weekends ago and can attest that they’re a mighty tasty alternative to the traditional blueberry muffin which can pack a serious caloric punch at an average of 450 calories a pop. Mine will set you back less than 1/3 of that.

Ingredients:

  • 1 cup whole wheat flour
  • ½ cup all-purpose flour
  • ½ cup almond meal
  • 1 tsp baking soda
  • 1 tsp baking powder
  • ¼ tsp salt
  • ½ cup cane sugar
  • ¼ cup agave or honey
  • 2 large eggs
  • 2 ripe bananas (mashed)
  • ¾ cup unsweetened vanilla almond milk
  • 1 tsp vanilla extract
  • 1 cup frozen wild blueberries

How to Make Them:

  1. Pre-heat oven to 350°F; spray 12-muffin pan with oil or line with fun paper liners
  2. In a bowl, mix together dry ingredients (flours and almond meal, baking soda and powder, and salt)
  3. In a separate, large bowl (or KitchenAid mixer if you have one), vigorously whisk together sugar and eggs. Add in your mashed banana, almond milk, and vanilla extract)
  4. Slowly add dry ingredients to wet ingredients, mixing as you go
  5. Once combined, gently fold blueberries into batter until just combined
  6. Fill each of the muffin pockets 2/3 full; bake for 25-30 minutes until a toothpick comes out clean

Try them out for yourself and let me know what you think!

3-Alarm Turkey Chili (Dairy-Free)

With fall in full swing, I wanted to make an easy, hot meal that would satisfy my foodie friends but still mesh with my healthy sensibilities. Nothing says autumn like hearty soups and spicy comfort food. What could be more in line with both of those things than chili? In my attempt to make a healthy, dairy-free version, I combined lean ground turkey and pinto beans with coconut milk, three different kinds of hot pepper and the perhaps surprising twist of unsweetened cocoa powder. Three satisfied ladies can attest that this recipe is not only good for you but just as, if not more tasty than traditional beef chili.

Before telling you how to make it, you know I have to drop a little nutrition knowledge on you. Beans are one of the healthiest complete proteins out there. In a recent USDA study, researchers measured the antioxidant properties of over 100 common foods. Three of the top four were types of beans, including pinto and red kidney beans. Unlike their animal counterparts, beans are a full of fiber and phytonutrients—naturally occurring chemical compounds found only in plants that are proven to have important disease fighting and antioxidant properties.

I’m a bean-believer, but know that not everyone is. My chili recipe is a great way to work this superfood into your diet without sacrificing flavor. You could even amp up your bean intake and keep this recipe totally vegetarian by replacing the ground turkey meat with another can of beans (remember red kidney beans made the top 4 list as well!). Stick to my dairy-free ingredients and this recipe will also be entirely vegan.

(Makes 4-6 servings)

Ingredients:

  • 8 Tbs Earth Balance © buttery sticks*, divided in two parts
  • ¼ cup all-purpose flour l lb ground lean turkey meat
  • 1 large onion, diced
  • 1 yellow bell pepper, diced
  • 1 green bell pepper, diced
  • 4 cloves garlic, minced
  • 1 Tbs chili powder
  • 1 Tbs chipotle pepper flakes
  • 1 Tsp ground cumin
  • 1 Tsp ground coriander
  • 1 Tsp unsweetened cocoa powder
  • 1 Tsp cayenne pepper
  • 1 cup unsweetened coconut milk
  • 2 (14.5 oz) cans diced tomatoes with green chilies
  • 1 small can tomato paste 1 (14.5 oz) can pinto beans
  • Salt and pepper to taste

For garnish**:

  • 2 avocados, sliced thin
  • ¼ cup green onions, diced

How it’s made:

  1. Heat a large saucepan over medium-high heat and add 4 Tbs of your Earth Balance© buttery sticks (don’t use their whipped spread—it won’t work as well). Add your ground turkey meat and cook until it turns golden brown—about 3-5 min. Remove from pan and set aside.
  2. In the same saucepan, reduce heat to medium and add the remaining 4 Tbs of “butter” and ¼ cup of flour. Stir to combine, forming your roux. Once that thickens into a paste, add your onions and sauté for 3-5 min until translucent. Add both bell peppers and your garlic, sautéing for another 3-5 minutes. Add all of your spices (chili, chipotle pepper, cumin, coriander, cocoa, and cayenne) and stir for another few minutes until combined and aromatic.
  3. Add coconut milk and stir to combine. Let this come up to a simmer (little bubbles) then add canned tomatoes and tomatoes paste. Add pinto beans and browned turkey meat, reduce heat to low and let simmer for another 10-15 minutes. Add salt and pepper to taste. If it needs more kick, add in some extra heat (chili, chipotle or cayenne—pick your poison).
  4. When you’re ready to serve, scoop this hearty soup into bowls and garnish with avocado slices and green onions. If you don’t have a dairy allergy (lucky duck!) add a couple spoonfuls of non-fat Greek yogurt. Serve with blue corn tortilla chips and nosh away!

*This is to keep it dairy-free but, let it be known, I firmly believe butter is better for you than any sort of substitute like margarine or vegan spreads. Why? Simple, they are full of chemicals. Butter is straight-forward and—when used in moderation—not unhealthy. I encourage you to use the real deal if you don’t have an allergy!

**If you aren’t worried about keeping this dairy-free, I highly recommend adding a couple tablespoons of non-fat, plain Greek yogurt. It will make this hearty dish even tastier—and Greek yogurt is super high in muscle-mending protein.

Beet & Black Rice Risotto

Another one of my twisted classics, this beet and black rice risotto will deliver the same satisfying, creamy comfort of a traditional risotto with some major health upgrades. Believe me, my genetics (and last name) make me a ‘rizzotto’ expert.

Let me drop some knowledge on you. Beets are packed with vitamins A, B (1, 2 and 6) and C–take that common cold! They also contain phytonutrients, naturally occurring chemical compounds with demonstrated antioxidant, anti-inflammatory and detoxification properties. Stemming from this burgundy root vegetable (pun intended) are its greens, which boast a higher concentration of iron than spinach.  They are also an excellent source of calcium, magnesium, copper, phosphorus and sodium. Not to be neglected are the mighty nutritional characteristics of black rice (which actually turns purple when cooked). By eating 10 spoonfuls of cooked black rice, you are ingesting as many anthocyanins (a potent antioxidant) as one spoonful of the well-known superfood, blueberries.

Now that you know how good the two main ingredients are for you, let me tell you how to make it! Bonus: this can be made vegan simply by omitting the optional goat’s milk gouda.

What you’ll need:

  • 1 cup black rice (I use Forbidden Rice)
  • 1 quart vegetable stock
  • 1 bunch beet greens, stemmed and washed
  • 2 tbs extra virgin olive oil
  • 1 large yellow onion, coarsely chopped
  • 2/3 cup arborio rice
  • 4 garlic cloves, minced
  • 3/4 cup dry white wine
  • 3 large beets (~1 lb) roasted, skinned and diced (Note: advance prep time needed!)
  • Salt & pepper
  • 2 tbs finely chopped Italian basil
  • OPTIONAL:1/2 cup goat’s milk Gouda cheese, grated

How to make it:*

  1. Before tackling steps 3-8, wrap your beets in foil and roast in an oven pre-heated to 350°F for 45 min-1 hour. When you can stick a fork in and pull it out with ease, they’re done. Immediately remove them from the foil and dunk them in cold water.  Use a spoon to pull the skin away, dice them up and set aside.
  2. Additionally, you’ll need to pre-cook the black rice. To do so combine with 2 cups water in a saucepan, add salt to taste and bring to a boil. Reduce the heat, cover and simmer 30 to 40 minutes, until all of the liquid has been absorbed by the rice. Remove from the heat and let sit for 10-15 min.
  3. Now, onto the main attraction. Bring vegetable stock to a simmer in a saucepan. Season with salt & pepper and reduce heat to low.
  4. Take your washed beet greens (you could also use swiss chard), stack them up and cut crosswise into 1/2 inch strips. Set aside.
  5. In a large saucepan–I use my Le Creuset 5 qt. dutch oven–heat the oil over medium heat and add the onion. Cook until the onion begins to soften (~3 min) and add the arborio rice and garlic. Cook until the grains of rice begin to crackle (~3 min).
  6. Here comes the labor of love part. Add in the wine and cook over medium heat, stirring constantly. When the wine has almost evaporated, stir in a ladle of the simmering stock (enough to just cover the rice). Cook, stirring continuously, until it is just about absorbed. Add another ladle of the stock and continue adding and stirring like this when the rice is almost dry for 10-15 min.
  7. Add in the greens, the diced beets and black rice and continue adding more stock, stirring often, for another 10 minutes. If all goes as it’s supposed to you’ll know because the arborio rice will be chewy but not hard in the middle–not soft like steamed rice. If it is still hard in the middle, continue adding stock and stirring for another 5 minutes or so. Add salt to taste.
  8. When the rice is properly cooked, add a generous amount of pepper, stir in another 1/2 cup of stock, the goat Gouda (again, optional) and the basil. Remove from heat. If the risotto isn’t creamy, add a little more stock, stir for another 5 min and serve.

*Disclaimer: this, like all risottos, is a labor of love. Definitely allocate at least an hour to make this from start to finish–and that doesn’t include the prep step of roasting the beets.

Adapted from Martha Rose Shulman’s “Black Rice and Arborio Risotto With Beets and Beet Greens” featured in NYT on Sept. 4, 2012.

Don’t ya like Bran Muffins?

I love muffins. We all do. On the contrary, not many of us love bran muffins, but we should. Here’s why: bran–the outer layer of grains like oats, wheat and rice–is made of insoluble dietary fiber. Bran is good for your GI tract, is a pro-biotic food (meaning it has natural antibacterial fighting properties), and helps in combating heart disease. I feel fairly confident that I’ve found a way to make bran muffins mo’ than nutritious, and dare I say delicious. Not only that, but I’ve made them low-fat by substituting a ripe banana for oil, nutrient-rich by using whole wheat flour and almond meal in lieu of refined white flour, and dairy-free by trading out buttermilk/yogurt for almond milk. Eating is believing, so enjoy!

AMY’S BANANA BRAN MUFFINS:

Ingredients:

  • 2 cups wheat bran
  • 1 1/2 cups currants
  • 1 cup water
  • 1 cup unsweetened chocolate or vanilla almond milk
  • 1 tbs orange zest
  • 1/2 cup Demerara sugar (or pure cane sugar)
  • 1 (very ripe) banana
  • 2 large eggs
  • 1/2 cup whole wheat flour
  • 1/4 cup almond meal
  • 1 teaspoon baking powder
  • 1 teaspoon baking soda
  • 1/2 teaspoon salt
  • 1/2 cup shredded (unsweetened) coconut – optional

Instructions:

  1. Preheat the oven to 350°F. Line a 12-cup muffin pan with paper liners or grease lightly with oil (I use the spray kind).
  2. Spread the wheat bran on a baking sheet and toast in the oven for 6-8 minutes, being careful not to let it burn!
  3. Let the bran do it’s thing while simultaneously heating the currants with 3/4 cup of the water for 10 minutes, or until the water is mostly absorbed. Puree the raisins with the remaining 1/4 cup of water in a food processor or blender until semi-smooth (I like to keep some whole or semi-whole currants in there for texture).
  4. Mix together the toasted bran and almond milk. Add in the currant puree, orange zest and Demerara sugar. Stir in the mushy banana and two eggs.
  5. In a separate bowl, mix together the flour, almond meal, baking powder, baking soda and salt. Fold into the wet ingredients and stir until everything comes together. Mix in the coconut (you could also add walnuts, pecans, or even chocolate chips here!)
  6. Spoon the batter into the muffin pan, mounding the batter in each one.
  7. Bake for 25 to 30 minutes, or until the muffins feel firm in the center.
  8. Let cool for 10-15 minutes then remove from the pan.

Enjoy immediately or freeze for up to 3 months. They are grrrreat for breakfast with a cup of coffee or tea and some fresh fruit. Bon appetit!

P.S. Just in case you didn’t quite catch the reference insinuated by the title: http://muffinfilms.com/psst.html. Psst!

Manifesto: Namaste, Muthaf*ckas

[youtube=http://www.youtube.com/watch?v=IMC1_RH_b3k]

There are those who laugh at this video and those who laugh with it. I’m of the with it variety and aim to make as many people as possible join me in that crowd. I mean, really, want to see where I can put my leg? You want to see where I can put my leg.

In all seriousness though, this video holds one of the keys to getting more people involved in yoga–the ability to laugh at yourself. The thing about yoga is that so many people take it (and themselves in doing it) SO seriously that it isolates a lot of us. That’s a crying shame because I truly believe that yoga can be beneficial for anyone and everyone. You don’t need to go hoarse Om-ing to reap the benefits of yoga. Just last night I had a long conversation about this with mama dukes as I strolled home along U Street from my studio. She wistfully recounted her first experience with yoga some 20 years ago. What she loved about it then and still appreciates about it now is that when you go to a class you’ll see everyone from 25-year-old hard bodies to 75-year-old grandmas. Heck, there’s even a 93 year old yoga teacher out there still doing her thing. Badass!

In carving out my own piece of this industry, I want MoYoga to help people achieve their personal fitness goals, whatever they may be, through mo’ than just yoga, ya dig? For some, yoga is about injury prevention through increased flexibility, muscle strength and improved balance. For others, it is about weight management, mindfulness (a.k.a. focus/concentration) and stress relief. Any combination of outcomes you hope to achieve through yoga is possible with the proper guidance and personal commitment. If you combine your practice with good nutrition, you’ll not only reach your goals but sustain your success. This is why a huge component of my future client work will be nutrition counseling, including weekly meal plans, shopping lists, healthy recipes and education about what fuel your body needs depending on your lifestyle.

Beyond physiology, my ultimate aspiration is to help people feel amazing about themselves by discovering or reclaiming their mojo. Whether you’re a professional athlete looking to optimize your performance or coming back from an injury, or somebody who just wants to be the healthiest, happiest and hottest version of yourself, it’s crucial to cultivate and nurture your self-esteem, self-confidence and, let’s be real, sex-appeal with as much dedication as your fitness and nutrition regimen. True health cannot be achieved through yoga moves alone. It’s all about addressing the entirety of a person’s needs from the inside out. So stay tuned, thanks for reading and get your moves, meals and mojo with me and MoYoga.

Lebanese Cabbage Wraps

Lebanese Cabbage Wraps

I’m a huge fan of Lebanese dolmas (stuffed grape leaves) with lamb, so when I was trying to think of a new recipe to put my healthy spin on these were a no-brainer. Don’t get me wrong, there is nothing wrong with eating the delicious lamb version of these babies. That said, on those nights when I get back late from a double session at my studio–e.g. tonight my ass got handed to me in a power yoga class, immediately followed by my first pilates class in over a year–I like to have something healthy ready to go in my fridge so I don’t just punish a jar of peanut butter or eat a whole bag of TJ’s Dark Chocolate Honey Mints.

My version of dolmas are made with cabbage leaves instead of grape leaves and ground turkey meat instead of lamb. Cabbage is rich in vitamins K, C and B6, as well as folate. It also contains large amounts of glutamine, an amino acid that has anti-inflammatory properties—key for athletes and those with joint issues. 90% lean ground turkey delivers 30g of protein at only 150 calories for a 3.5oz serving. The best part? Infused with yummy turmeric, ginger and all spice, they taste really freaking good. Scout’s honor!

Here’s what you need:

  • 1/2 cup bulgur
  • 1 large head Savoy cabbage
  • 2 tbs extra-virgin olive oil
  • 2 cups finely chopped white onion
  • 1 shallot, minced
  • 3 cloves of garlic, minced
  • 1/2 tsp turmeric
  • 1/2 tsp ground ginger
  • 1/2 tsp all spice
  • 1/4 tsp cinnamon
  • salt and pepper (to taste)
  • 12 oz ground turkey
  • 1/2 cup flat-leaf parsley, coarsely chopped
  • 1 large egg
  • 1/2 cup white wine
  • 1/2 cup reduced sodium chicken broth
  • 2 tbs grated lemon zest (divided)
  • 2 tbs lemon juice

Here’s how you do it:

  1. Prepare the bulgur according to package instructions and set aside in a large bowl.
  2. Preheat oven to 325°F.
  3. Bring 2 1/2 cups of water to a boil in a large saucepan. Trim the bottom of your cabbage and separate the leaves. Place the 12 largest leaves in the boiling water, cover and reduce to medium heat. Cook the leaves until they soften (about 8 minutes) then remove from water and set aside to cool. Keep the remaining cabbage leaves uncooked.
  4. While the cabbage is cooking, heat the olive oil in a large skillet over medium heat. Add your onion and shallot and sauté for 5 minutes. Add your garlic and sauté for an additional 2 minutes. Add your salt, pepper, turmeric, ginger, all spice and cinnamon and cook for another 2-3 minutes to combine and infuse the flavors.
  5. Transfer the onion mixture to your bowl of bulgur and let stand until cool enough to handle. Add the lightly beaten egg, parsley, 1 tbs lemon zest and ground turkey. Give the mixture a good knead until it all comes together, well blended.
  6. Line a 9×13-inch baking pan with some of the uncooked cabbage leaves. Take the cooked cabbage leaves and place about a 1/3 cup of the filing at the root end of each leaf. Fold in the sides and roll it up like a burrito. Lay the rolls seam side down in the pan.
  7. Combine the lemon juice, remaining lemon zest, chicken broth and white wine. Pour the mixture over your cabbage rolls. Cover the pan tightly with tin foil.
  8. Bake the rolls for 40 minutes, or until the thicker veins of the cabbage leaves are very tender.
  9. Plate and enjoy!

I usually eat two or three in a sitting. They are so full of fiber and protein that I always feel stuffed after eating a few. One of my favorite things about this recipe is that they keep well. I’d say they’re good in the fridge for up to a week.
Hope you like them!

Pesce alla Puttanesca

For those of you who have met me, you know I am as blonde-haired and blue-eyed as they come. Consequently, when people first learn my last name, Rizzotto, their immediate reaction is something along the lines, skerr?! Looks can be deceiving folks. I’ve made it my life’s mission to prove my Italian heritage by cooking classic dishes from the homeland with my own healthy and modern twist. Trust, you won’t be a skeptic after your try out this recipe. One might say, the proof is in the puttanesca.


Pesce alla Puttanesca

Ingredients:

  • 4 4-oz Tilapia fillets
  • 1 tbs olive oil
  • 6 cloves of garlic, crushed or sliced thin
  • 1 28-oz can whole peeled tomatoes, drained
  • 1 cup pitted black olives
  • 1 cup can pitted green olives
  • 2 tbs nonpareil capers
  • 1/2 cup chopped fresh flat-leaf parsely
  • 1/2 tsp chili powder
  • 1 tbs fresh lemon zest
  • 1/2 fresh lemon, juiced
  • Salt and pepper to taste


Directions:

  1. Preheat oven to 425° F. In a large nonstick, oven-safe saucepan, heat olive oil over medium heat and add garlic. Sauté for 2 minutes, or until golden brown and aromatic. Add tomatoes, crushing and breaking them into small chunks with your hands (all good Italian cooks bring love to their food by getting hands-on). Cook for 3-4 minutes. Add capers, olives (halved), parsley, chili powder, salt and pepper. Bring to a simmer and cook for another 5 minutes.
  2. Season both sides of your fish with olive oil, salt and pepper. Lay the fillets on top of your vegetables and transfer the saucepan to pre-heated oven for 12-15 minutes.
  3. Remove pan from the oven and distribute the fillets on four plates. Add lemon zest and juice to the veggies and give the mixture a good stir to combine. Spoon generous amounts of the sauce over your fish and serve with a slice of lemon.

To round out this meal, I suggest making a nice green salad and getting some fresh ciabatta. After all, no Italian meal is complete without some carbs. Buon appetito!

Healthy Obsession: Chia Pudding

Unless you’ve been living under a rock, or perhaps rural Kentucky, you’ve heard the buzz around chia seeds. Yes, these are the same chia seeds popularized in the ’80s by Chia Pets (“watch them grow!”), now apparently the latest tool of Obama’s electoral campaign…but I digress.

These ancient Aztec nuggets have been given a new lease on life and a substantial share of the health food industry due to their impressive nutritional checklist: Iron, Magnesium, Calcium, protein, dietary fiber, antioxidants and the highest concentration of skin-perfecting Omega-3s found in any whole food. Like all A-list health foods these days, chia seeds are raw, gluten-free, kosher, and vegan. Tree-huggers worldwide, rejoice!

I am always skeptical of ‘superfoods’ that make lofty promises–e.g. açaí berries–but after trying these out in a number of recipes from homemade energy bars and smoothies to oatmeal and most recently PUDDING, I’m a believer. Plus, bonus (!!), anything with a few tablespoons of chia seeds in them make you feel full and satisfied. One reason for this is their fiber content (5g per tablespoon). The other reason is these little guys plump up in liquids, acting as a thickener and replacing the need for gelatin in the following recipe.

So, back to PUDDING. I recently made a really yummy batch of chia seed pudding and had to share. Life is about moderation and every now and again I’m sure as hell going to splurge on a red velvet cupcake or chocolate lava cake, but, come on now, who doesn’t love a guilt-free dessert? This recipe is so simple, so tasty and super healthy to boot.

Spiced Chocolate Chia Seed Pudding

  • 2 cups of unsweetened vanilla coconut-almond milk
  • 1/2 cup of chia seeds
  • 1/3 cup of agave syrup
  • 1/4 cup unsweetened cocoa powder
  • 1 tsp cinnamon
  • 1/4 tsp chile powder (if you like more kick like me, double)

Mix all the dry ingredients together in a tupperware then pour the wet ingredients on top, whisking vigorously. Cover and place in the refrigerator. Et voilà, 6-8 hours later your dessert is ready! The consistency is a little funky–think some combination of bubble tea tapioca balls and passion fruit seeds–but don’t knock it ’til you try it. Now go and enjoy your delicious, chocolate-y creation knowing it’s nutritious and delicious.

[slideshow]

I’ve also made a vanilla version of this recipe, which I may or may not have eaten for breakfast this morning. Shh, don’t tell! Just remove the cocoa and chile powder and replace those flavors with the pulp of one vanilla bean.