DIY Bootcamp – Choose your own adventure!

Do you remember those good ol’ “choose your own adventure” books? They were so much fun! What happens when a bootcamp coach recalls such happy childhood memories (said no one ever…)? Well, yours truly turns bootcamp planning into adventure mapping, only instead of journeying under the sea or creating your very own robot my bootcampers got to choose whether to do burpees or tuck jumps, push-ups or V-Ups, and so on and so forth. What fun!

I know what you’re thinking…I want to choose my own bootcamp adventure!!!! Well, ask and ye shall receive. Below is your very own roadmap.

Choose Your Own Bootcamp Adventure


Try it out from start (50 Plank Jacks) to finish (10 Roll Ups/Roll Downs – a Pilates move) three times, picking a different path each time. It should take you around 30 minutes and kick your butt! Grab a buddy to hold one another accountable and make it a little more fun.

My (mostly) all-natural skin care regime for combination skin – tried and true!

 I’ve battled skin issues since I was 14. I spent years in high school, college and beyond punishing my skin with harsh chemicals and ravaging my insides with all kinds of antibiotics. The topical medications were effective for a while but they’d without fail eventually dry out my skin until I developed a different kind of skin issue. The pills my dermatologists were all too eager to prescribe also worked like magic, but knowing what I know now about gut health and the damaging effects of chronic antibiotic use I wish I could go back and pick a more natural path.

Better late than never.

For the last few years I’ve experimented with a variety of homemade, natural and gentle skin care treatments. Age is certainly on my side – my hormones have calmed down over the years – but my skin has never been better now that I treat it like I would treat any other vital organ in my body. Be kinder to your skin and if you can, skip the harsh chemicals and antibiotics. After years of trial and error here is what I’ve found that works for me….
img_6617
Every morning, I rinse with cold water to wake up and lightly pat my skin dry. After that, I use a homemade toner (1 part Thayer’s Rose Petal Witch Hazel with Aloe Vera: 1 part apple cider vinegar), followed by EltaMD UV Daily Tinted Broad-Spectrum SPF 40 moisturizer. The SPF component is key. I’ve used other brands that are “matte-ifying” and despite having oily-to-combination skin I think I look less greasy when I used the non-matte-ifying kind.
thayers-rose-petal-witch-hazel-with-aloe-vera
Every night, I wash my face with Herbivore Charcoal Bar Soap and dry it using a clean wash cloth, moving it around in small circles to gently exfoliate and lift off any residual moisturizer or makeup. I then layer on a thin coat of Dr. Alkaitis Organic Soothing Gel. I love how this feels on my skin – it’s like I can feel it tightening and toning! It’s not cheap but it lasts forever since you use so little each time. After that, I smother my face with a thick layer of Jason Aloe Vera Moisturizing Creme, which smells divine and is super affordable ($9 or less for 4 fluid ounces).
dr-alkaitis-soothing-gel
These rituals have worked for me on a daily basis for the last year and a half and haven’t shown any signs of losing their efficacy. As I get older, however, I realize it’s so important to give my skin a little more loving than this baseline alone, so three times a week I exfoliate using a homemade mix of coarse sea salt in honey and jojoba oil (1 part salt: 1 part honey: 2 parts jojoba oil).
img_7215
And once a week I use Peter Thomas Roth Rose Stem Cell Bio-Repair Gel Mask. I’m obsessed with this mask even though it is a little pricey by comparison to my other favorite products. I always feel like I’m glowing and dewey afterwards. Well worth it in my humble opinion!
peter_thomas_roth_rose_stem_cell_bio-repair_gel_mask_1_900x900
It’s a lot to invest in up front but these products stretch for a long time and your skin (and the environment) will thank you! It might take longer to see the results you desire but your skin will appreciate your patience.

Detox your Cleaning Cabinet: Top 5 Homemade Cleaners for a Healthier Home

Okay, so we’re a little past the point of spring cleaning but with last weekend’s summer solstice behind us perhaps we can call this an article dedicated to better-for-you-and-the-environment summer cleaning.

As a nutrition coach, I help guide dozens of people each year through my seasonal, whole foods detoxes. Cleaning up one’s diet is all well and good, but to truly detox we all ought to dive a little deeper into our daily habits and our cleaning closets/cabinets.

How many people out there use a countertop spray or bathroom cleaner loaded with ingredients you can’t pronounce?

I’m not here to shame you because I too have used these strange, chemical concoctions. I’m simply here to point out that, hey, if smart people like Mark Bittman recommend that we not eat anything with ingredients we can’t pronounce, why doesn’t that rule apply to the products we use daily on surfaces we eat off of and bathe in? Skin is a very porous organ, my friends! All of these products can easily seep into your system with repeated exposure whether you accidentally ingest trace amounts or simply absorb them from repeated contact.

Avoiding damaging chemical cleaning products is easier than you might think. In fact, you likely have most if not all the ingredients you need to clean and shine your pad right in your very own kitchen, pantry, and medicine cabinet.


Now that I really have your attention, here are my…


 Top 5 Homemade Cleaners for a Healthier Home


  1. All Purpose Cleaner
  • 1/2 cup white vinegar
  • 2 cups water
  • Juice of 2 lemons

Notes:

  • Fill a spray bottle with all ingredients. Shake well before dispensing.
  • Mist dirty surfaces evenly, then use a soft cloth or rag to wipe surfaces clean.
  • Don’t use on stone surfaces—i.e. granite or marble.


  1. Wood Polish
  • 1/2 cup olive or almond oil
  • Juice and peel of 1 lemon

Notes:

  • Combine ingredients at least one day in advance for optimal efficacy.
  • Apply to a soft dishtowel first, then gentle rub in circular motions across the intended surface.


  1. Bathroom Disinfectant
  • 1/2 cup white vinegar
  • 1/2 cup vodka or rubbing alcohol
  • 20 drops of tea tree oil
  • 10 drops of lemon oil

Notes:

  • Fill a spray bottle with all ingredients. Shake well before dispensing.
  • Mist dirty surfaces evenly, then use a soft cloth or rag to wipe surfaces clean.


  1. Glass Cleaner
  • 2 cups water
  • 2 Tbs white vinegar
  • 2 Tbs rubbing alcohol

Notes:

  • Fill a spray bottle with all ingredients. Shake well before dispensing.
  • Mist dirty surfaces evenly, then use a soft cloth or rag to wipe surfaces clean.


  1. Grout Scrub
  • 1 1/2 cups water
  • 1/2 cup baking soda
  • Juice of 2 lemons
  • 1/4 cup white vinegar

Notes:

  • Apply with a toothbrush and let sit for 5 minutes. Scrub vigorously to remove dirt and grime.
  • Wipe clean with a wet cloth and rinse with warm water.


Not only are all of these fumeless, non-toxic, and organic – they’re cheap and easy to make! Who doesn’t like cheap and easy?!

DIY All-Natural Beauty: Age-Defying Coffee Sugar Scrub

Do you eat right? Exercise? Take moments to pause, breathe and reduce stress? If so, you’re doing just about everything right to lead a healthy lifestyle. A well-balanced diet full of fruits and veggies and low on junk food combined with movement and meditation are all key components to overall wellness.

One area that most of us neglect, however, are the products we put on our skin. Like our stomach, intestines and liver, our skin is an organ and it too can benefit from a little detox every now and again. The best part about detoxing your beauty regimen is you’ll save a lot of money—makeup and spa products are expensive!

Today, you’ll learn how easy it is to make an all-natural, age-defying spa treatment at home using ingredients you likely already have in your kitchen or pantry.

MOARfit DIY Age Defying Coffee Scrub via www.moar-fit.com

This DIY remedy’s active ingredient is coffee. Coffee is not only loaded with free radical-fighting antioxidants—those are the pests that lead to drooping skin and age-related disease—but the caffeine in it acts as an anti-inflammatory and may even lessen the appearance of cellulite. Three cheers for that!

MOARfit DIY Age Defying Coffee Scrub via www.moar-fit.com

It’s so simple to make your own age-dying coffee scrub at home, and here’s how to do it:

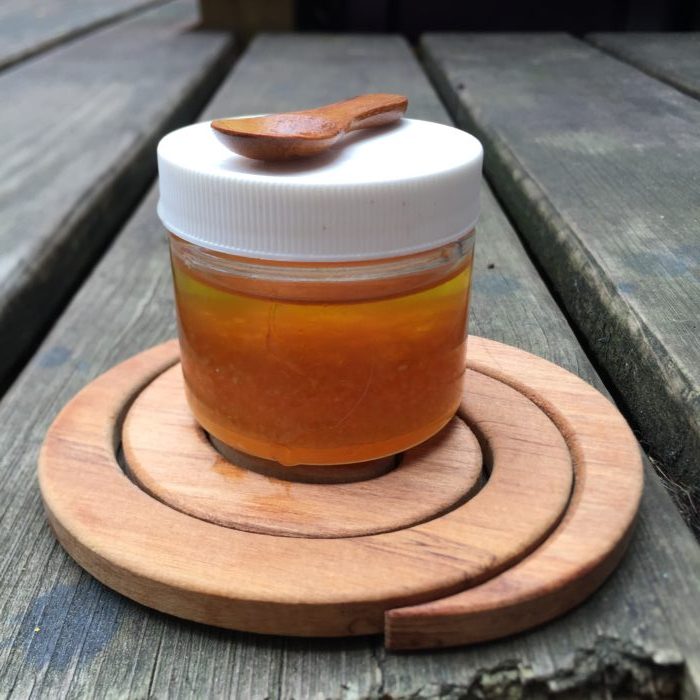
MOARfit DIY: Age-Defying Coffee Sugar Scrub

What You’ll Need:

  • A mason jar-or any other air-tight container
  • 1/2 cup coffee grounds
  • 1/4 cup granulated raw cane sugar
  • 2 Tbs raw honey
  • 1 Tbs ground cinnamon
  • 1/4 cup coconut oil, softened—you can also use sweet almond oil

How to Make It:

Combine all ingredients in your mason jar, stir well and close the lid until you’re ready to use it.

MOARfit DIY Age Defying Coffee Scrub via www.moar-fit.com

To Use:

Scoop out a small amount and rub it onto your skin, massaging the area thoroughly to increase circulation. Let it sit for a few minutes then hop in the shower to rinse off. You can do this daily on the body, and once or twice a week on the face.

Have another favorite DIY beauty remedy? I’d love to learn about it. Start a conversation on Twitter @MOARfit or find me on Facebook.

{originally published on The DC Ladies blog, August 12, 2014}

DIY Gluten-Free Pizza Night

Over the past few years I have watched friend after friend turn gluten-free. Some have tested positive for Celiac Disease. Others simply feel better without gluten (a protein) in their system and likely have some degree of sensitivity or intolerance. I too have ventured down the less-bloated road devoid of bread, pasta and pancakes a time or two. Somehow I always find my way back to the (good) stuff–usually when they bring out the bread basket at a mussel bar.

image (1)

I’ve said it before and I’ll say it again, I’m a big believer in moderation. Many health experts, including  Dr. Alessio Fasano, Director of the Center for Celiac Research at the University of Maryland Medical Center, have concluded that gluten sensitivity exists on a spectrum. More anecdotally, I have experienced first-hand that by completely eliminating the protein from my diet I feel less sluggish, but the moment I slip the inflammatory and energy-zapping effects rebound with a vengeance.

image (2)

My suggestion? Eat everything in moderation (unless you have Celiac). Don’t eat pasta every night. Do eat quinoa–maybe even a few times a week. Be brave and try new grains–think amaranth, millet, buckwheat, etc. And, by all means, treat yourself to pizza every now and again–whether its the regular variety, or my homemade, gluten-free version below.

image

Gluten-Free Pizza Crust

Adapted from: www.glutenfreegirl.com

What You’ll Need:

  • 1 tbs ground flaxseed
  • 2 tbs boiling water
  • 1 cup brown rice flour
  • 1/2 cup garbanzo bean flour
  • 1/2 cup tapioca flour
  • 1 tsp turmeric
  • 2 tsp kosher salt
  • 4 tsp active-dry yeast
  • 1/4 cup olive oil (plus extra for brushing on top of the crust)
  • 3/4 cup warm water

How to Make It:

  1. Mix flaxseed in a bowl with 2 tbs boiling water. Whisk vigorously until it’s a thick paste. Set “slurry” aside to cool.
  2. Combine gluten-free flours, salt and turmeric (for color mainly) into the bowl of a stand mixer. Mix together.
  3. Pour yeast into a separate, small bowl with olive oil and 1/2 cup warm water. Stir and let stand a couple minutes to activate the yeast.
  4. Add slurry to dry ingredients in mixer and mix until combined. Pour yeast/oil/water into dry ingredients. Mix on medium for a minute, or until your dough starts to come together. If your dough is too dry, add remaining 1/4 cup of warm water in small amounts (or more if needed) until the dough feels workable. Remove from mixer, form into a ball and set  aside to rise for 1 hour–covering gently with a damp kitchen towel.
  5. Time to bake! Preheat oven to 450°. If you have a pizza stone or cast iron griddle pan (the smooth side), place it in the oven. If not, sprinkle a baking sheet with cornmeal.
  6. Generously dust a clean surface with cornmeal or gluten-free flour of choice. Roll out dough using a rollin pin dusted with gluten-free flour to your desired thickness (I went with super thin).
  7. To make individual size crusts and speed up the cooking process, use a large canister lid (approx. 6″ in diameter) to cut dough rounds. You may have to clump the scraps together into a ball and roll the dough out a few times to use it all up.
  8. Transfer dough rounds to pizza stone, smooth griddle or prepared tray. Brush the tops with olive oil. Bake until dough has started to crisp and brown around edges, about 4-6 min. Remove from oven. This is your pre-baked pizza crust.
  9. Top with tomato sauce or (my preference) mashed sweet potatoes and your favorite toppings (see suggestions below) and return to oven for another 4-5 min or until the cheese (if it’s on there) is melted.

Suggested Toppings to Please Any Crowd:

  1. Sauteed red onions
  2. Spinach
  3. Sauteed wild mushrooms
  4. Sauteed asparagus, zucchini or squash
  5. Super-thinly sliced eggplant rounds
  6. Roasted garlic
  7. Sun-dried tomatoes
  8. Goat cheese (or your cheese of choice)
  9. Sweet potato puree (literally just mashed, pre-cooked sweet potatoes) – great alternative to sauce!
  10. Prosciutto or small bits of pancetta
  11. Fresh basil
  12. Salt, pepper and a drizzle of good olive oil!

DIY Holiday Gift Idea: Infused Vinegars

In the latest edition of one of my favorite cooking magazine’s Eating Well, I came across a great Christmas gift idea. Since I make my own salad dressings all the time, I know the simple joy of having a tasty flavored vinegar to work with as your base. Eager to start exploring the art of canning and itching for a new DIY project, I thought making infused vinegars as gifts this holiday season just might fit the bill.

The finished product!

As a nutrition enthusiast, I was also pleased to learn that out of the 6 herbs used in these two infused vinegar variations 4 made the Huffington Post’s Top 25 Healthy Herbs list. In the Oregano, Rosemary & Marjoram Infused Vinegar, oregano has both antibacterial and antifungal properties. It has also been found to be effective against yeast-based infections. Rosemary is rich in several antioxidants, making it a potent combatant of inflammation. In the Fennel, Orange & Star Anise Infused Vinegar, star anise and fennel provide a sweet taste similar to that of black licorice when used in foods. Anise seeds have been proven to soothe tummy aches and help with symptoms of the common cold.  For the ladies out there, estrogen-like properties found in anise may increase milk flow in breastfeeding mothers, treat menstrual symptoms and boost libido. Feeling bloated? Fennel is your GI track’s buddy, helping your body deal with uncomfortable digestive issues (WebMD).

THE RECIPES:

Oregano, Rosemary & Marjoram Infused Vinegar:

  • 6 cups distilled white vinegar
  • 9 sprigs fresh oregano
  • 9 sprigs fresh rosemary
  • 9 sprigs fresh marjoram
  • Additional fresh herbs for decoration (optional)

Fennel, Orange & Star Anise Infused Vinegar:

  • 6 cups distilled white vinegar
  • 9 fronds from 1 fennel bulb
  • 3 strips zest from 1 medium orange (see Tips)
  • 9 whole star anise (see Tips)
  • Additional fresh herbs for decoration (optional)

What you’ll need:

  • 6 pint-size (2-cup) glass canning jars (3 per recipe)
  • tongs
  • cheesecloth
  • decorative vinegar cruts (2 16-oz or 4 8-oz)

How to make them:

  1. Wash 6 pint-size (2-cup) heatproof glass-canning jars and their lids with hot soapy water. Rinse well with hot water. Fill a large, deep pot about half full with water. Place the jars upright into the pot; add enough additional water to cover by 2 inches. Bring the water to a boil; boil jars for 10 minutes. Add the lids to the pot, and then remove the pot from the heat. Let the jars and lids stay in the hot water as you prepare the flavoring and vinegar. (Keeping the jars warm minimizes breakage when filling with hot liquid.)
  2. Thoroughly rinse herbs with water. Remove the jars from the water bath with a jar lifter or tongs. Divide the herbs among the jars. Heat vinegar in a large saucepan to a bare simmer (at least 190°F). Carefully divide the vinegar among the prepared jars, leaving at least 1/4-inch of space between the top of the jar and the vinegar. Remove lids from the water bath, dry with a clean towel and screw tightly onto the jars.
  3. Store the jars in a cool, dark place, undisturbed, for 3 to 4 weeks. Strain vinegar through cheesecloth into another container. Repeat as needed until all the sediment is removed and the vinegar is clear. Discard all solids and pour the strained vinegar back into rinsed jars or divide among sterilized decorative bottles. Decorate with a few well-rinsed fresh herbs, if desired.

With Christmas just one month away, time to get cracking! These babies need 3-4 weeks to really let the flavors seep in, so why not make this Sunday Funday a little better with a little DIY action and save a little extra $$$ for Cyber Monday.