Rosewater Raspberry Gluten-Free Scones

I highly recommend taking a long weekend with friends, yummy food, and outdoor walks in the sunshine; and without a computer or to do list. Like highly recommend it. I recently did just this up in NYC with some of my dearest girl friends with whom (is that proper grammar??) I studied abroad nearly 10 years ago. Damn, the years are flying by! Anyways…


We had a ball! Despite bopping around a bunch like an itinerant little gypsy, the weekend wasn’t stressful at all. Leaving my computer at home certainly helped, but mostly it was my lack of an agenda – something I struggle to let go of in my daily DC grind – that created space and time to do everything I needed and wanted with flexibility and a sense of ease.


Here are some highlights…


On Saturday, I went to the Union Square Famers Market (amazing) and gawked at peonies the size of my face and farm-fresh eggs that looked like the most beautiful golden nuggets I’ve ever seen. I would have stayed there the whole day if it weren’t for the sweltering heat and sweaty mess I had quickly become.


IMG_5245

IMG_5242


Sunday, was a day filled with jamm, which means “peace” in Wolof, Senegal’s native tongue. The girls and I throw that word around a lot when we’re together since Dakar was our study abroad destination and jamm was our main objective while there.


All day I was surrounded by these four mighty and magnificent women who inspire, nurture and love me to no end. How lucky am I? Together, we made a version of the gluten-free scones you’ll see below as well as some delicious frittatas.


Food is always best when made with love and enjoyed in good company. All of that was abundant and then some. We gabbed for hours while dining al fresco on a Brooklyn co-op rooftop. Heaven on earth.


IMG_5301


I rounded out the weekend spending time with one of my other very best friends from childhood, Court. Actually, let’s call her my sister. Much more appropriate for our bond. We’ve known each other since age four and no matter how long we go in between visits, it feels like we’ve never skipped a beat.


While waiting for her arrival at an amazing Jewish Deli somewhere in lower Manhattan, I decided to express my joy for a weekend well spent with a little urban hand-standing. What else is a yogi to do?


IMG_5265


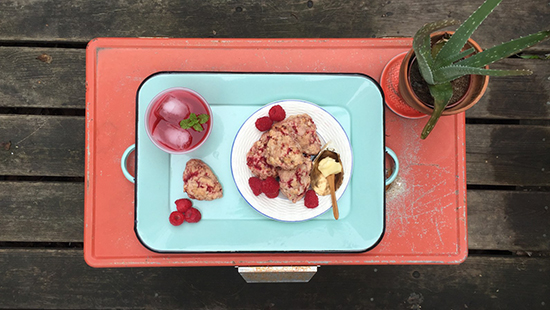
I could regal you with all the mundane details of what made that weekend so magical in my mind, but instead I’ll simply suggest you try out these Rosewater Raspberry Scones and taste for yourself some of the love and jamm I brought back with me from NYC.


IMG_5305

Rosewater Raspberry Gluten-Free Scones

Makes ~16  2 1/2-3″ scones.
Ingredients:
  • 2 1/2 cups Bob’s Red Mill Gluten-Free Biscuit Mix
  • 1/2 cup Gluten-Free Rolled Oats
    3/4 cup 2% or Whole Milk (note: you can substitute 1/2 cup unsweetened almond milk + 1/4 cup plain coconut milk yogurt to make this vegan)
  • 10 Tbs butter, cold and cubed
  • 1/4 cup Rosewater
  • 1 large egg
  • 1/3 cup cane sugar
  • Zest of one lemon
  • 1 1/2 cups fresh raspberries
  • Optional: 2-3 Tbs Milk for basting
  • Optional: sprinkle of corse sea salt

Directions:

  1. Preheat oven to 350 degrees Fahrenheit.
  2. Combine dry ingredients in a large bowl. Blend with butter cubes using a pastry cutter. You can also use your finger to pinch the butter into the flour mixture if you don’t have one.
  3. In a separate smaller bowl, whisk together milk, egg, rosewater, zest and sugar.
  4. Combine the wet and dry ingredients in the larger of the two bowls. Knead with your hands until dough is combined. It may be a bit chunky/flaky, but that’s good for scones.
  5. Fold in raspberries until evenly distributed.
  6. Shape into small round disks, approximate 2 – 2 1/2″ in diameter. Place on a lined baking sheet 1″ apart.
  7. Baste raw biscuits with a smear of milk, then sprinkle lightly with corse sea salt.
  8. Bake at 350 degrees for 22-26 min, or until the tops turn golden and a toothpick comes out clean.

Sweet and Tangy Tandoori Chicken Thighs

Need an easy weeknight dinner idea that won’t leave you wanting for flavor? This past week was a crazy one for me but it doesn’t mean a girl doesn’t still need something tasty, homemade and nutritious to restock the tank at the end of the day. For me, roasted chicken always hits the spot when I crave something cozy, satiating and convenient.


From start to finish, this easy recipe for chicken thighs takes under 30 minutes. It’s delicious served hot, but leftovers can be easily stored for lunch or dinner throughout the busy work week. Pair it with a side kale salad and roasted veggies for a filling, healthy and budget-friendly dinner perfect for a small gathering, family meal or broken down into several individual servings (batch-cooking style) for one.


Sweet and Tangy Tandoori Chicken Thighs

(makes 4-5 servings of protein)

Ingredients

For the Chicken

  • 4-5 chicken thighs, bone in and skin on
  • 3-4 Tbs grapeseed oil
  • Salt and pepper to taste


For the Marinade

  • 1 Tbs Tandoori Seasoning Blend (Penzey’s)
  • 1 Tbs Pomegranate Molasses
  • 3 Tbs Grapeseed Oil
  • 1/4 cup Red Wine Vinegar
  • 1 Tbs Tomato Paste
  • Pinch of Sea Salt


Directions

For the Chicken

  1. Pre-heat over to 350 F.
  2. Heat an oven-safe sauté pan over high heat. Add 3-4 Tbs grapeseed oil.
  3. Bring chicken thighs to room temp. Pat dry. Season chicken on both sides with salt and pepper.
  4. Start chicken skin side down in pan. Cook untouched for 5 minutes. Flip and cook another 4 minutes.
  5. Pour marinade over chicken thighs, coating evenly. Transfer to oven and bake for 10 minutes.
  6. Remove and let sit at least 5 minutes before serving.


For the Marinade

  1. Add all ingredients to a mason jar or air tight container and shake vigorously until combined.


One Year On.

With my hands planted at the top of my yoga mat, a genuine 90-degree angle at my wrist and elbow, I marveled at how normal I felt this morning balancing in Crow Pose. This normalcy evoked a deep sense of gratitude that I could not only make this shape but that I could hold it without grit or strain. I hovered there thinking, wow, the body is an amazing machine and one that can heal in the most remarkable ways.

One year ago today, I was struck by a car while riding my bike. What followed—the surgery, physical therapy, baby steps back into my active lifestyle, and eventually greater challenges to my rebuild strength (like a very humbling Rocket Yoga teacher training)—was tough stuff but helped me learn tools I now use on a regular basis to heal other areas of my life beyond just the physical.

IMG_0195
Looped up on narcotics in the days leading up to surgery. I can never thank my dear friend Caroline and her family enough for coming to my rescue that night and weekend. Love you!

Life has this funny way of throwing a whole lot of challenge your way all at once, doesn’t it? We’ve all been there. What’s so wonderful about these low points is that when we crumble we’re left with all these pieces of different size, weight and shape and we have to consciously figure out how we want to put them back together. We get this rare chance to build ourselves up better than before.

As Nikki Giovanni recently said on one of my favorite NPR podcasts, On Being with Krista Tippett, “ sometimes you must take the ingredients you’re given and make the best thing you can make.”

It wasn’t all roses. So many times over the last year I’ve felt angry, scared and frustrated at physical limitations and emotional land mines stemming from the accident and personal trials during the initial recovery period. When I learned to accept those emotions as part of the basket of ingredients I was given, the whole process got a whole lot easier. Let go, or be taken. Feeling broken and broken down brought me to this place where for the first time in my life it felt okay to lose control. Like I was allowed to be a bit of a hot mess for a while. To cry when I felt pain or hurt. To let others help me even when I wanted to do it all myself. To let little chores and tasks slide that would’ve normally irked me until they were complete. It was freeing.

It made things so simple. I knew that all I could do was tend to the ingredients I was given. I could not control the outcome of surgery. I could not make myself heal. I could not will my way to any ideal recovery. I could, however, take care of myself during the process, body and mind, and make for the best.

IMG_0468
My attempt to embrace the ingredients I was given. Work with what you’ve got!


This is tough for a goal-oriented person, as so many of us are. When we can relax our attachment to results, we open to the process and it becomes far less scary. Fear is a powerful thing so sometimes it helps to be forced to face your fears. For me that meant, getting back on my bike the day I was cleared; allowing myself to have a full-on, ugly cry break-down on a dirt road in upstate New York when skidding on a downhill pass brought me right back to that moment of impact; and acknowledging that my physical strength was not the only strength I possessed. What I lost in physical strength, I gained in inner fortitude.

IMG_4658

Today, I will take my bike, Bruiser, on a joy ride to celebrate our  journey together this past year. There has been so much change, so much challenge but all my sassy little bike and I can do is keep rolling and tending to the ingredients we’re given to make our world a safer, kinder, more compassionate place for ourselves and for others to live and love.


How to pick the best yoga mat for you.

Reviews.com recently conducted over 50 hours of research atop dozens of different yoga mats to determine the best buy for traction, cushioning, budget, environmental conscious and more.

The 9 Overall Best Yoga Mats

  1. Manduka PROlite ($74.18)
  2. Lululemon “The Mat” ($68.00)
  3. Jade Harmony Professional Mat ($59.95 – $217.14)
  4. Manduka Black Mat Pro ($98.00 – $283.36)
  5. Hugger Mugger Para Rubber ($83.52)
  6. PrAna Revolutionary Sticky Mat ($90.00)
  7. Kharma Khare ($70.00)
  8. PrAna E.C.O ($28.80 – $48.00)
  9. Gaiam Print Premium ($29.98)

Having spent thousands of hours atop my yoga mats over the years, I can attest that my top two line up with their #3 and #1 respectively. I’m a Jade girl, through and through, but love the Manduka PROlite as well – so much so that we carry it at my studio, Yoga Heights. Why do I prefer my Jade though? First, the Jade Harmony Professional Mat offers excellent traction and support and it only gets better with time. The best part about this mat however is that it’s made from all-natural rubber, making it environmentally friendly. As a bonus, JadeYoga also plants a tree for every mat that’s purchased – so far that’s a whopping 1,099,000 trees! I love that this mat got Reviews.com’s “Best Eco-Friendly Yoga Mat.” 

Check out the full article to learn about their top picks and discover the best mat for your needs.

Beauty Blooms from Muddy Waters: A Guide to Getting Unstuck

There is an ancient Buddhist value which espouses that the most beautiful things bloom from the muddiest of waters.

“Like a lotus flower that grows out of the mud and blossoms above the muddy water surface, we can rise above our defilements and sufferings of life.” {here is an associated meditation you can try}

Sometimes it takes a while to believe that and you often have to go through heartbreak, illness, or some kind of soul-shaking duress to realize it’s true. For me, the process of getting unstuck from that mucky bottom to the freedom of a sun-kissed surface goes a little something like this…

You lift one foot and it feels as heavy as a Clydesdale. You set it down only to feel it sink into the mud. You’re stuck, like your feet are frozen in a ice tray. You muster all your strength to free it from the tundra only to find that familiar weight again. And so it goes. A slow, slog through muddy waters until you get close enough to the shore that the ground beneath your feet is more compact, less exhausting and more forgiving. Pretty soon the water clears and you’re hitting your stride. One foot in front of the other. You’ll likely be tired, in need of some time to make the conscious and challenging choice to shake it off, but you’re reassured of your strength and perseverance all the same. After all, you didn’t sink; you didn’t drown; you made it. It’s not easy. In fact your journey, whatever adversity it stems from, kind of stings. You will survive. Yes you will be changed from it, but you will be okay because really you always were.


My advice for how to make it through this process, whatever the source of defilement or suffering?


Step 1: Stay busy. Schedule yourself silly. I don’t always recommend this given how little down time most of us allow ourselves but when you’re going through muddy waters you’ve got to create accountability that keeps you going. This should work great for all my fellow type-A, DC go-getters out there. Do. Many. Things. Distraction can be such a blessing in the initial fallout from getting rocked.

Step 1B: Move your body. Part of staying busy is IMHO not only doing but moving. What better time to take a yoga class that’s so challenging it takes you out of your head, or use a run or bike ride as a means to explore a different part of town? With spring fast approaching, outdoor activities are all the more appealing and the added bonus of doing anything on a sunny day is the boost of vitamin D (and mood lifting hormones) you’ll get. Just be sure to wear your sunscreen!

Step 2: Stay connected. Though it can be tempting to check out or turn in, don’t. The more you shut yourself off to the world the harder it becomes to open up again. Make dates to see girlfriends, join a running group, see if you can be helpful to a friend who needs a babysitter, volunteer, foster a dog then take that puppy to a local dog park, visit friends in other cities, go home to see family – the list goes on and on. As my 21-year-old self decided to get tattooed in grand scale across my back years ago, Nit Nitay Garabam, or, “a person is a person’s remedy.” Your friends, family and community will be there for you. Be kind enough to lean on them. [P.S. I still love this tattoo. Thanks Mom and Dad for giving me the coolest 21st birthday present a gal could ask for! And thanks Yasmeen for helping me get the Wolof script Arabic right! ]

Step 3: Create something. Anything. Whether it be doodling in an adult coloring book, journaling, trying to figure out the choreography to Beyoncé’s “Formation” in your bedroom late at night (who would do such a thing…), or any number of other creative outlets, find something that is a form of expression and go express yourself. It’s incredibly cathartic. Try it.

Step 4: Get outside yourself. Give back to your local and/or at-large community. Find a cause that speaks to you and get involved. When you pour yourself into something entirely not for or about you, it gives great perspective on everything that you still have in your life to be grateful for. Need some ideas? Try Volunteer Match or Idealist as a place to get you started.

Step 5: Turn inside. No, this is not me encouraging you to indulge in self-analysis. We all pour over the details of injury, illness, heartache, loss, abuse, and other muddy topics just fine on our own. The kind of internal discovery I’m suggesting is of the more mindful variety: meditation. Meditation helps us walk through our inner landscape and make peace with all the scary monsters and gentle giants that lie within. As one of my favorite yoga teachers once recounted, mindfulness meditation helps us make the neighborhood of our minds a friendlier place. There are countless approaches to meditation, but I recommend starting with loving kindness meditation. Also known as Metta Meditation, the practice of loving kindness is a pathway to forgiveness and moving on. It can be challenging, but with time it helps to evoke an overall sense of warm-heartedness and compassion which can be lost in times of struggle. Mindfulness meditation is another great way to go. Rather than letting yourself become distracted by nagging thoughts and self-judgement, it encourages us to acknowledge whatever it is that’s paining us, feel it, and breath beneath it to the seed of calm that always exists at the core of our being. It may sound far fetched, but at this point it’s scientifically proven.

This “guide to getting unstuck” isn’t something to follow to a T. You don’t have to do all of these things, follow this pathway in order, or do anything that doesn’t feel right or helpful to you. These are merely suggestions. Sometimes all we need is an approachable yet actionable idea to get us up and moving again. I know that all of these steps have at one point or another helped me get back on solid ground again in the aftermath of life’s curveballs. I hope they help you as well.

When you’re stuck, all you need to do is the next right thing. And then the next right thing. And then the next…and so on, until eventually you feel safe and strong in your own skin again. It’s a continuum and it’s hard to say exactly when those small steps amount to an overall shift where you feel whole again. Therein lies the beauty of our struggles. Every moment we have a choice. We can choose to harden or soften; to shutdown or feel; to close our heart or open to vulnerability. If we approach the hard stuff breath by breath, hour by hour, day by day it starts to feel a lot less daunting and we can pick our own path of resilience to climb out of the muck.

Thai Coconut Lemongrass Soup with Shrimp

When you know you’re about to get snowed in, it helps to have a plan for what you’re going to eat when you’re all cooped up. Once it became clear that DMV meteorologists had actually gotten predictions for the Jonas Blizzard right, we knew we were in for a doozy. Queue the mass rush to grocery stores and empty shelves in the days leading up to any actual precipitation. Thanks to my abnormal, self-employed schedule I got to hit up the grocery stores when there weren’t as many folks there and get all the ingredients I needed to bring my culinary vision to life. My biggest meal prep take-away? Plan ahead and get it done early so you don’t have holes in your pantry or refrigerator.

For me it wasn’t hard to decide on a menu, but if you struggle with that it helps to scour your favorite food blogs for ideas. I knew I wanted to make soul and belly warming meals that would make forced nights in feel special. I also needed them to be hearty enough to refuel us after all our shoveling.

Night one was a really tasty (and pretty spicy) Thai coconut lemongrass soup which I’ve mapped out for you below. The following night was pan-seared chicken thighs with caramelized onions, roasted beets and a side of sautéed mushrooms and kale. Breakfasts were protein-heavy. One morning we did eggs in a hole (so much fun if you’ve never tried) and the next we lightened things up with green smoothies. Warm, hearty, and healthy meals. Check, check!

IMG_3877

Thai Coconut Lemongrass Soup with Shrimp

Makes 4 meal-sized portions


Ingredients:

  • 1 – 14 oz can full-fat coconut milk
  • 1 – 14 oz can “lite” coconut milk
  • 2 cups chicken or vegetable stock
  • 1 Tbs coconut oil
  • 2″ grated fresh ginger root
  • 2 cloves of garlic
  • 1 Tbs red chili paste
  • 1/2 large red onion, peeled and finely diced
  • 2 stalks dried lemongrass
  • 1 red pepper,  finely diced
  • 2 cups brown, white or shiitake mushrooms, rinsed, dried and sliced
  • 2 lbs large uncooked shrimp, tail-on
  • 1/2 cup cilantro
  • 1/2 cup toasted cashew pieces
  • 2 limes
  • 1 serrano pepper, seeds removed and sliced thinly
  • 2 cups cooked brown rice (optional: make a blend of brown rice, quinoa and amaranth for a more hearty flavor)

Directions

  1. In a large, heavy-bottom pot, sauté the ginger, garlic, Thai chili paste and red onion in coconut oil over medium heat for approximately 5 minutes, or until the onion is tender. Season to taste with salt.
  2. Add in coconut milk, stock and lemongrass and bring to a low boil. After a 3-5 minutes, add the red pepper and mushrooms. Cook another 3 minutes, then add the shrimp and cook for another 3-4 minutes or until the flesh of the shrimp is opaque.
  3. Spoon a 1/2 cup of rice into each bowl and ladle soup over it. Squeeze half a lime over each serving. Garnish with fresh cilantro, toasted cashew pieces and hot pepper slices to taste.

Rock your next Half Marathon with this Modified Training Program

I just made it through week 1 of my 12-week half marathon training program and enjoyed a lovely run through Rock Creek Park in balmy 55-degree December weather. In the past I’ve gotten repeatedly injured in the lead up to running events, so I’m committed to being smart and diligent about training this time around.

What you see below is adapted from the well-known Hal Higdon Intermediate Half Marathon Training Guide. I’m a yogi thus there is a lot more stretching, foam rolling, and “self-care”-esque elements to my plan of attack. My goal: run fast, remain injury-free. There is no worse feeling than training really hard for something only to blow out a knee or tear a hamstring a couple weeks prior to race day.

Half Marathon Training

This plan is intended to keep your muscles and mind healthy and happy for 12 weeks straight. Feel free to shift your week’s workouts around to accommodate your busy schedule. Make it doable otherwise you’ll start to resent and cop out on it.


Healthy Slow Cooker Chicken Chili

Let’s face it, who wants to cook after all the work that goes into preparing a Thanksgiving feast. Even if you weren’t one of the culinary artists toiling away in the kitchen, you too may also be suffering from post-holiday food fatigue (no thanks to the L-Trytophan found in turkey). We still have to eat though so why not prepare something that’ll last, or even get better by the day and only takes 10 minutes hands-on time?

Queue the slow cooker. There are countless ways to use the slow cooker from a hearty-yet-healthy lentil soup to the more decadent french toast method. Chili’s are no stranger to the slow and low method but since I try not to consume too much red meat, I thought I’d give chicken chili a try. Of note, I used chicken thighs in this recipe to keep the cost low but if you wanted to go for an even leaner chili, stick to chicken breast.

IMG_3360

Most importantly, this recipe passed the Tilly Taste Challenge. Okay, so maybe a dog isn’t the best judge of a meal’s flavor and complexity, but her hound nose can’t lie – it smells darn good! Try it for yourself and let me know what you think.

Healthy Slow Cooker Chicken Chili

Makes 6-8 servings | Hands-on time: 10 minutes | Total time: 5-7 hours

Ingredients:

  • 1 15-oz can pinto beans, drained
  • 1 15-oz can black beans, drained
  • 1 28-oz can crushed tomatoes
  • 2 cups chicken stock
  • 4 boneless, skinless chicken thighs
  • 1 Tbs cajun creole seasoning
  • 1 Tbs cumin
  • 1/4 cup apple cider vinegar
  • 1/4 cup olive oil, divided
  • 2 heaping Tbs pickled jalapeños
  • 4 cloves of garlic, minced
  • 1 white onion, diced
  • Salt and pepper to taste

Directions:

  1. Sauté onions and garlic in 1 Tbs olive oil until tender and translucent (about 5-7 minutes.)
  2. While they’re cooking rinse and drain your beans in a large colander and pull everything else out so it’s ready to go.
  3. Transfer onions and garlic to your slow cooker and add all other ingredients (be sure to use the liquid from your tomatoes), submerging chicken thighs completely.
  4. Cook on low for 5-7 hours, or until your chicken thighs pull apart easily with a couple of forks shredding in opposite directions.
  5. Adjust for seasoning and add extra salt, pepper, spices or heat as desired.
  6. Serve plain or top with a dollop of greek yogurt, sliced green onion, and your favorite hot sauce.

IMG_3358

Mindful Eating Boosts Productivity

We live in a busy world where everything moves fast and we often barely have time to eat, yet food is one of our most important sources of pleasure.  Unfortunately, as a result of our hectic schedules when it comes to eating food we’re often distracted by something else (cell phones, computer, kids, laundry, getting ready for bed, etc). In a rush, we often chew and swallow fast and end up eating more…and more. Voilà, mindless eating!

According to the CDC more than 34% of all us adults are obese and half as many children are as well (17%).

This is certainly not all a result of mindless eating but it is certainly a contributing factor for many people. Mindless eating is a reflection in many ways of just how disconnected we are from our food.

Perhaps a bigger problem than mindless eating itself is than in doing so we’re actually rendering ourselves less productive. I know, I know. Many of us think that by multitasking our meals we’re getting more done in our days, but recent research has really debunked the theory of multitasking being genuinely productive.

In fact, only 2% of us multitask effectively.

On the flip side, mindful eating does make you more productive. Mindful eating, like all mindfulness practices, helps increase our focus and concentration. Also, by eating until we’re satisfied rather than stuffed, we’re less likely to get the lethargy and brain fog associated with over-eating.

So what is mindful eating and how do you start to incorporate in your busy life?

Mindful eating is an application of the Buddhist philosophy of being in the moment, which is thought to be a huge part of the path to contentment and ultimately enlightenment – or as we say in the yoga world, “bliss.” Mindful eating is about making deliberate choices about the food you choose to nourish yourself and those you love with. It is also about slowing down and becoming aware of how we eat. A mindful eater focuses on all the sensory experiences around food: identifying tastes, observing colors, smelling aromas, and noticing textures.

Try this mindful eating exercise to kickstart more awareness and presence around the process of making and eating food. The more we learn to focus on the task at hand, whether than be eating our lunch or knocking out a work email, the more efficient and ultimately content we’ll all be.